Fusion 360 thermal simulation, step by step
By Admin, 09/09/2026 · 3 min read

Fusion 360 workshop
Fusion 360 thermal simulation, step by step
Set the cup's inner surfaces to 80 C and the surrounding air to 25 C, then inspect the steady-state temperature distribution. Use the chosen material's thermal conductivity and a convection coefficient appropriate to the airflow.
Heat transfer
Conduction, convection and steady state
Conduction moves heat through the plastic. Convection moves heat from the surface to the air. Steady state means the temperature has settled, so the result doesn't show warm-up time.
05 Thermal
Thermal, step by step
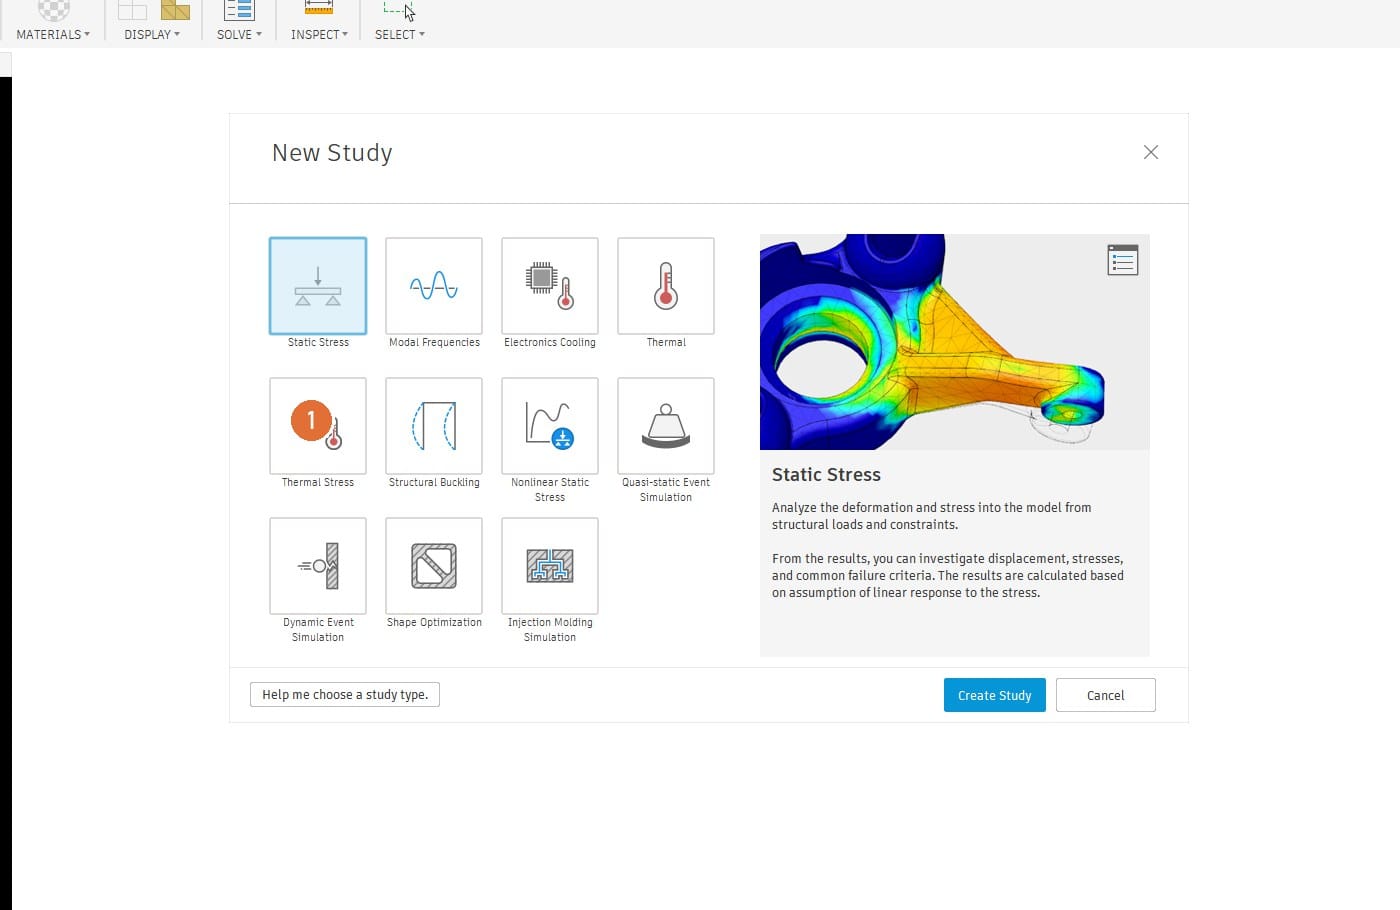
New Study: Thermal

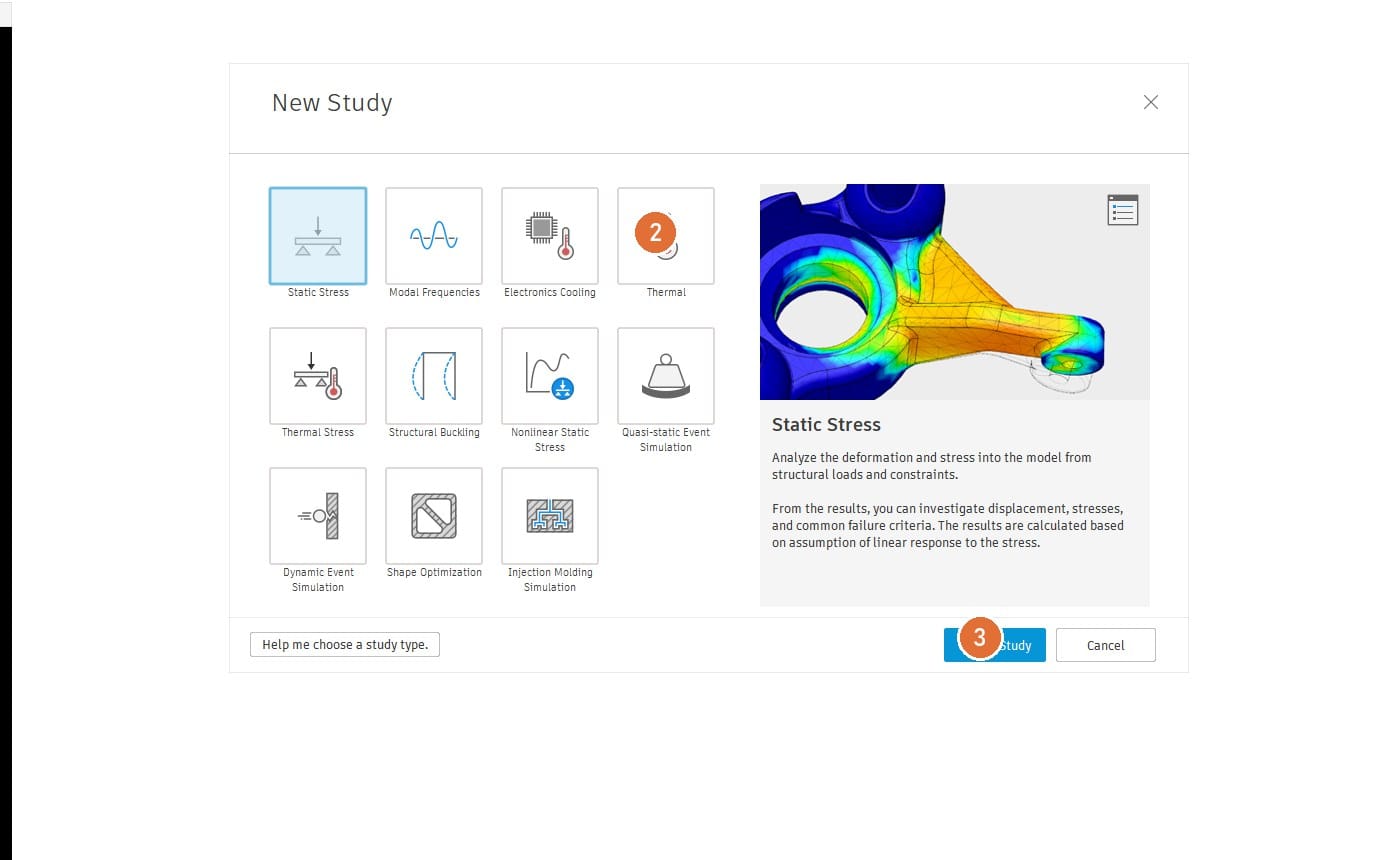
- 1New Study: STUDY group, SIMULATION workspace.
- 2Thermal: Select the tile labelled Thermal. Check the access requirements and charge shown for your account.
- 3Create Study: Study 2 - Thermal appears under the same Simulation Model. Open Study Materials and confirm ABS Plastic.
On screen: Study 2 in the browser with its own Load Case1, Mesh and Results.
Applied Temperature: 80 C inside the cup

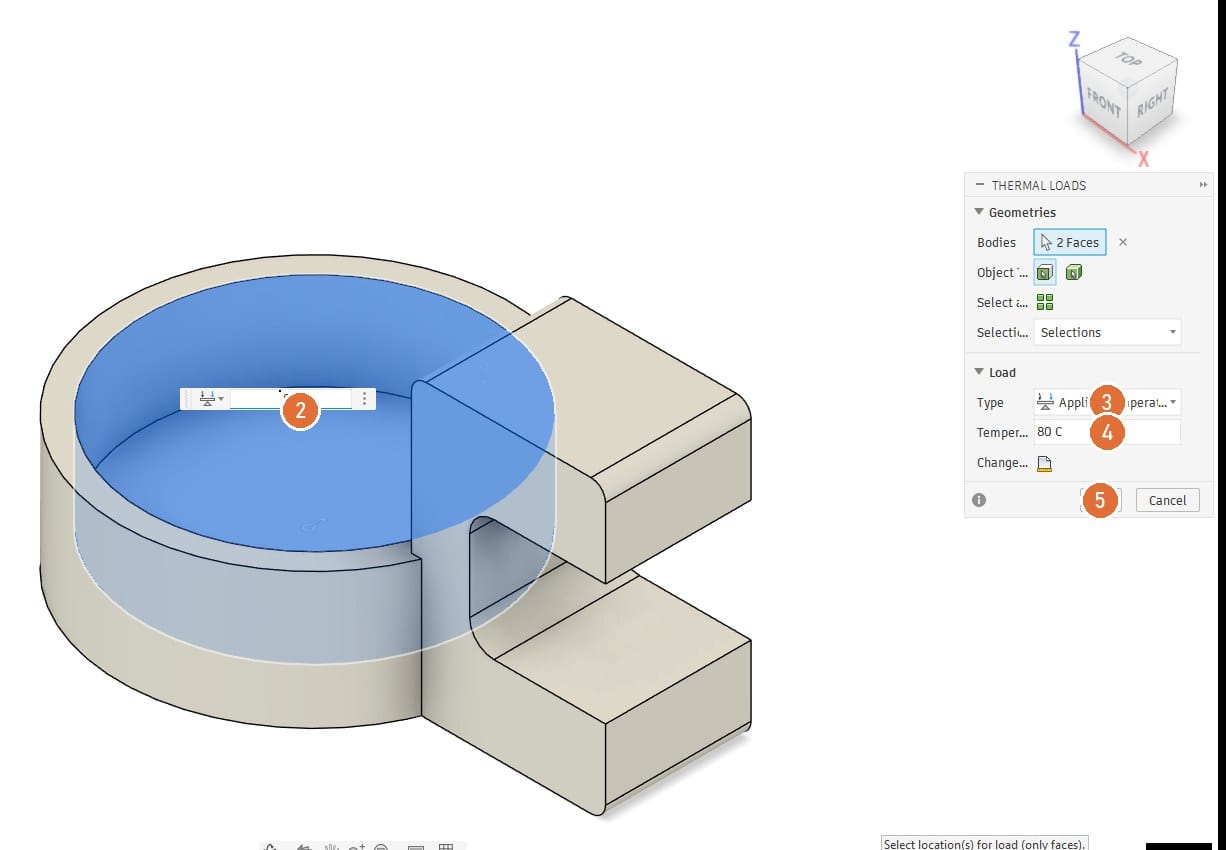
- 1Thermal Loads: LOADS group. Select the cup floor and inner wall, then open Thermal Loads.
- 2Cup floor and inner wall: Ctrl-click both. Bodies reads 2 Faces.
- 3Type: Applied Temperature.
- 4Temperature: 80 C for this example. This holds the selected faces at a fixed temperature throughout the study.
- 5OK
80On screen: The two inside faces shaded blue with a thermometer icon.
Convection on every other face: 10 W/m²K to 25 C

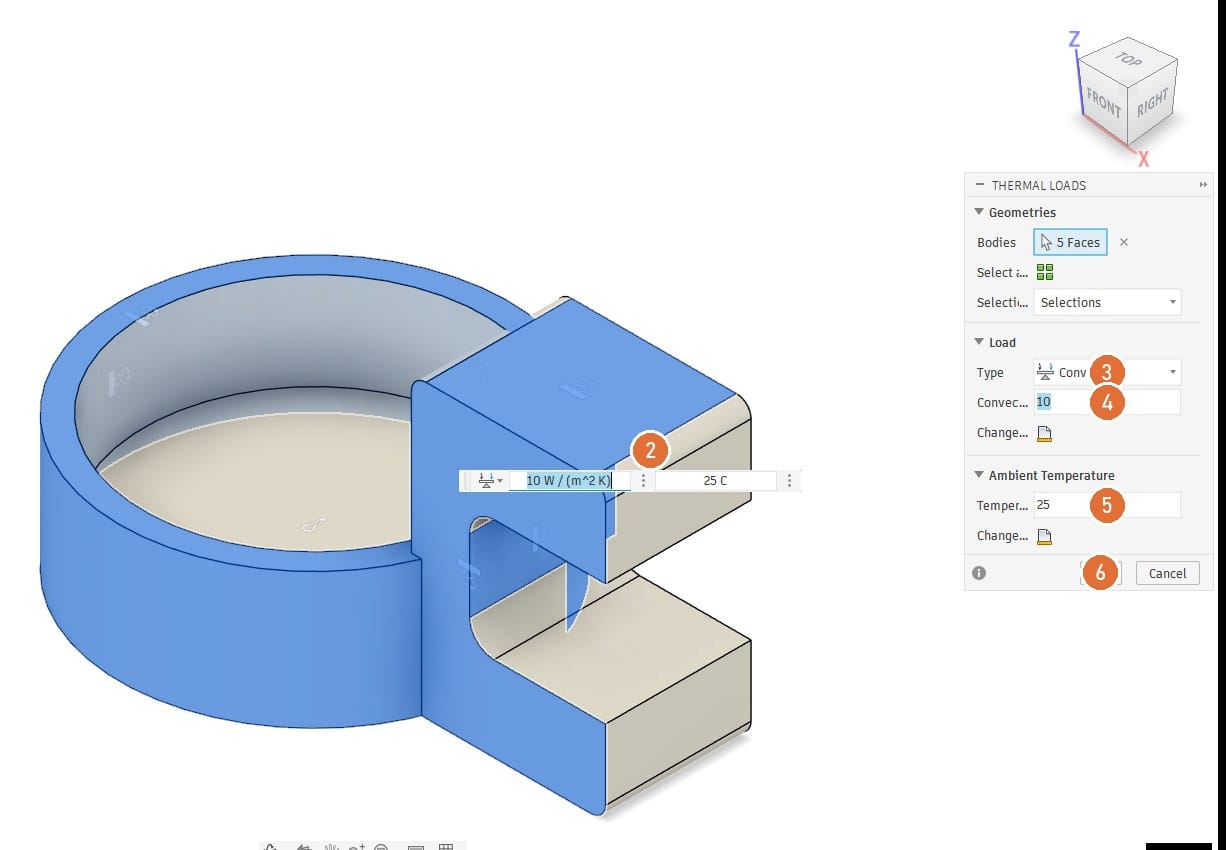
- 1Thermal Loads: Select the outside faces first: rim, outer wall, base, and every face of the clamp.
- 2Outside faces: Window-select the whole part, then Ctrl-click the two inside faces off. Bodies reads the count.
- 3Type: Convection.
- 4Coefficient: Enter 10 W/(m² K) for this exercise. The actual coefficient depends on airflow, surface orientation and geometry.
- 5Ambient: 25 C.
- 6OK
10 25On screen: The outside faces shaded blue. Load Case1 under Study 2 holds two thermal loads.
Generate the mesh and solve

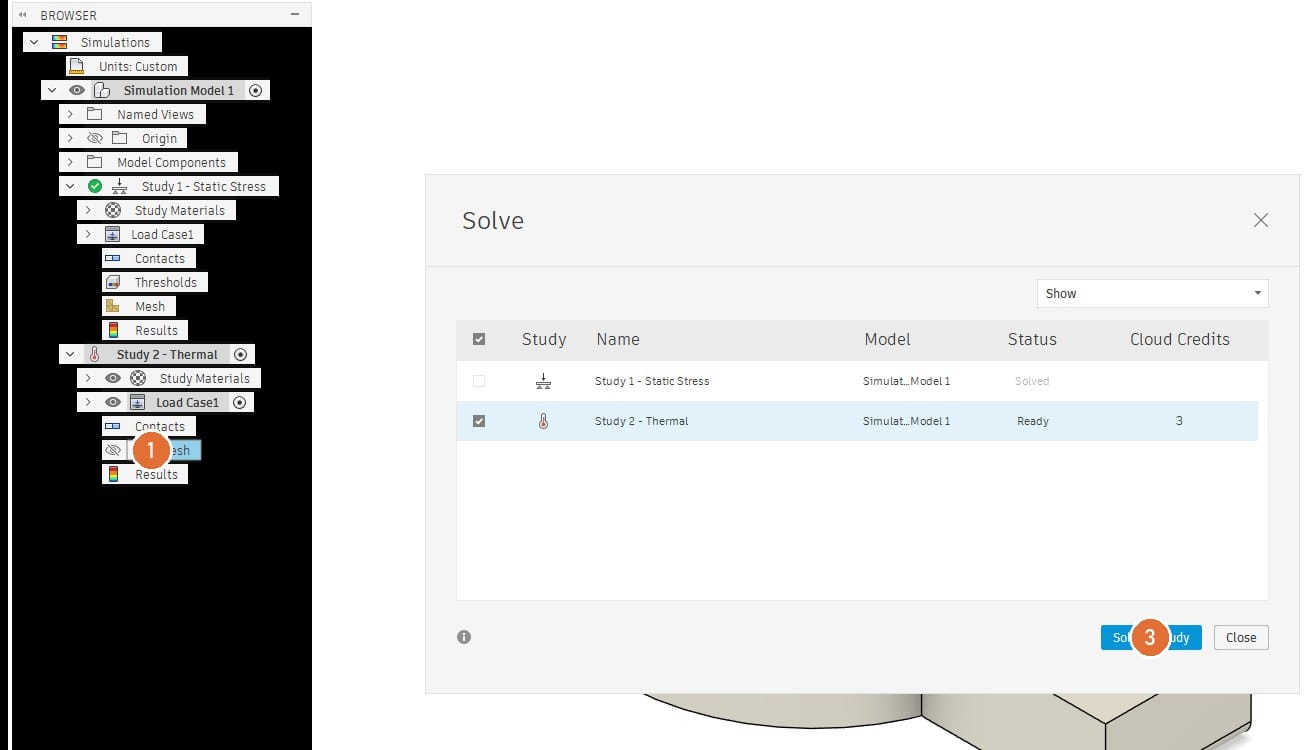
- 1Mesh: Right-click Mesh under Study 2 > Generate Mesh.
- 2Solve: SOLVE group.
- 3Solve 1 Study: Cloud Credits reads 3 for Study 2. Study 1 shows Solved and is unticked.
On screen: When the solve finishes, open Results and select Temperature.
Result: temperature, 26 to 80 C
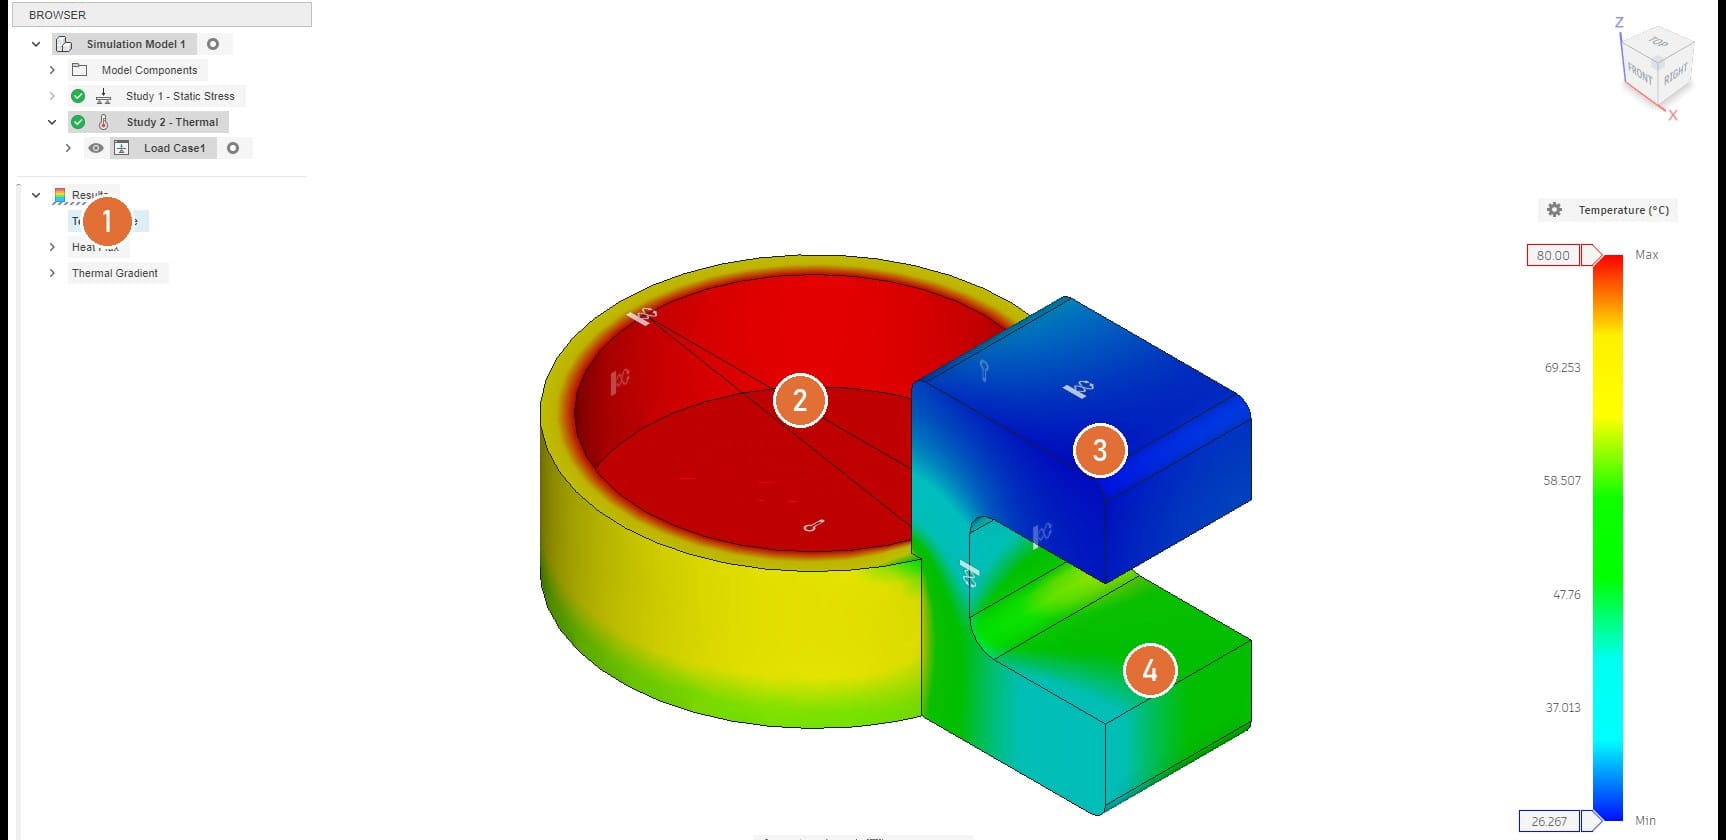
- 1Temperature: Results list. Heat Flux and Thermal Gradient are the other two.
- 2Inside the cup: 80 C, red. Held there by the load.
- 3Clamp top: About 45 C, green.
- 4Slot faces: Around 30 C in this example. The model does not include heat transfer into a separate desk body.
On screen: Yellow cup wall, green joint, blue clamp. Minimum 26.3 C on the far face of the clamp.
Material choices
Material options for a cup wall above 60 C
Thermal stress study
New Study > Thermal Stress
Use Thermal Stress to study deformation and stress caused by temperature changes. These can occur when expansion is constrained or when joined materials expand differently. Check solve access before continuing.
Related articles

Fusion 360 cup holder: modelling, step by step
Build the Fusion 360 cup holder from a blank file: C profile, cup body, cavity, fillets and a desk parameter.

Fusion 360 to Bambu Studio: 3MF export and slicing, step by step
Export the Fusion 360 cup holder as a 3MF file and check print orientation and slicing in Bambu Studio.

Fusion 360 static stress simulation, step by step
Set up the Fusion 360 static stress study for the cup holder and read safety factor, von Mises stress and displacement.