SensorsBack to MakerAccess Project Guides
Sensor Projects
By Admin, 06/07/2026 · 7 min read
No-solder Arduino and sensor projects using the 37-in-1 sensor kit, OLED display, breadboards, jumper wires, motors, and requestable FIT components.
Electronics and sensors
Build no-solder sensor projects
Use the Arduino boards, breadboards, jumper wires, OLED display, and 37-in-1 sensor kit for small circuits first. Larger ideas can request extra components from the wider FIT inventory.
Survey and feedback
Help improve MakerAccess
Have an idea for what MakerAccess should stock, improve, or explain next? Share it in the survey. If you bought or used a product and want to comment on the item itself, use the product feedback form.
Do the surveyProduct feedback formSetup pictures
What each part does
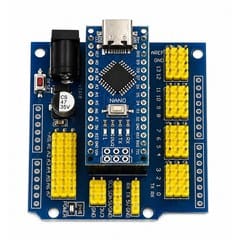
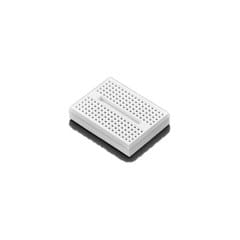
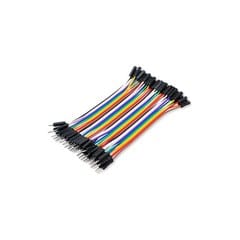
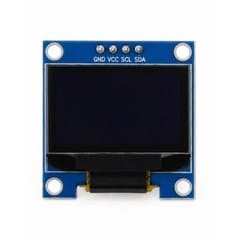
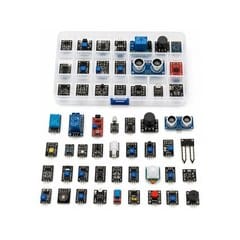
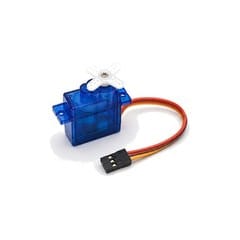
Use the photos to match the physical parts before wiring anything.
Before wiring
Build one sensor at a time before combining several parts.
Connect ground first, then power, then signal wires.
Use the Arduino IDE or simulator to test simple code before adding a display or motor.
The local product photo does not show every sensor label clearly, so match each module against the insert or labels in the physical kit before wiring.
Connection maps
First circuits to copy
Start with one of these maps, then swap the sensor or output once the first reading works.
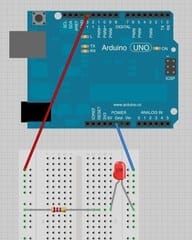
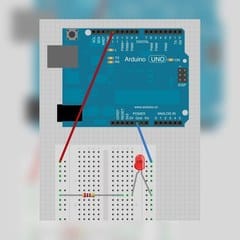
LED and resistor wiring
Use a resistor in series with the LED. The resistor can sit before or after the LED, but the circuit still needs one current-limiting resistor.
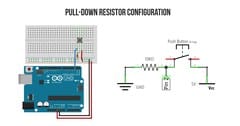
Push button with pull-down resistor
A button input needs a defined HIGH or LOW state. This map follows Arduino's Button example with a 10k pull-down resistor.
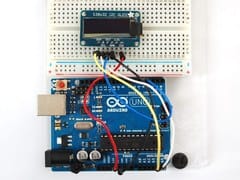
OLED I2C wiring
Most small I2C OLED displays use four wires: power, ground, SDA, and SCL. On an Uno, SDA is A4 and SCL is A5.
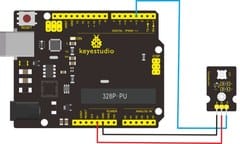
3-pin sensor module wiring
Most 37-in-1 modules start with VCC, GND, and one signal pin. Wire ground first, then power, then signal.
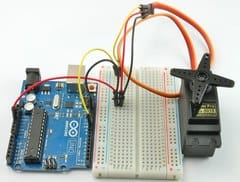
Servo signal and power
A servo needs power, ground, and one signal wire. Keep the grounds common, and avoid loading the Arduino 5V pin with heavy mechanical loads.
Component map
What to look for in the 37-in-1 kit
37-in-1 kits vary by supplier. Use this as a practical map, then check the exact module names in the box.
Controls
- Digital push button
- Capacitive touch sensor
- Potentiometer module
- Joystick module
- Rotary encoder
Light and output
- White LED module
- RGB LED module
- Traffic light module
- 4-digit LED display
Sound
- Active buzzer
- Passive buzzer
- Analog sound sensor
Motion and distance
- Line tracking sensor
- Infrared obstacle avoidance sensor
- Photo interrupter
- PIR motion sensor
- Ultrasonic distance sensor
Touch and vibration
- Collision sensor
- Knock sensor
- Digital tilt sensor
- Analog ceramic vibration sensor
Environment
- Analog temperature sensor
- Photocell module
- Water level sensor
- Soil moisture sensor
- Steam moisture sensor
- Flame sensor
- Linear temperature sensor
- DHT11 temperature and humidity module
Magnetic and infrared
- Hall magnetic sensor
- Reed switch
- Digital IR receiver
- Digital IR transmitter
Support and control
- Motor module
- Voltage detection module
- Single relay module
- Pulse rate monitor
37-in-1 module library
Open the full kit guide
The kit article has source photos for all 37 modules and subpages for each sensor or output.
Beginner projects
Start with these projects
Use the listed components to build one working circuit at a time.
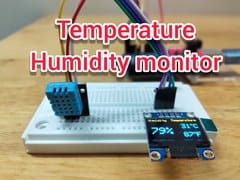
Room Monitor
Read temperature or humidity and show the result on the OLED display.
Project components
37-in-1 Arduino Sensors KitArduino Nano & Expansion BoardOLED DisplayFemale to Male 10 cm WireWhite USB Type-C Cable
What this teaches
digital sensor readingsdisplay outputserial debugging
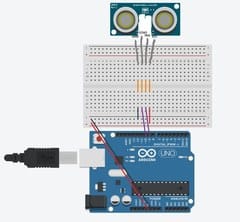
Distance Meter
Use an ultrasonic sensor to measure distance, then display the value or show a colour warning.
Project components
37-in-1 Arduino Sensors KitArduino Nano & Expansion BoardOLED DisplayFemale to Male 10 cm Wire
What this teaches
time of flightinput timingdisplay output
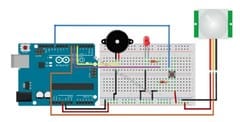
Motion Alert
Trigger an LED or buzzer when motion is detected.
Project components
37-in-1 Arduino Sensors KitArduino Nano & Expansion BoardLED KitFemale to Male 10 cm Wire
What this teaches
digital inputevent responsesimple alarm logic
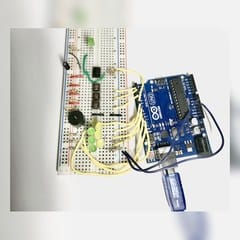
Reaction Game
Flash an LED, press a button as fast as possible, then show the reaction time.
Project components
Arduino Nano & Expansion BoardLED Kitx10 Push ButtonSmall BreadboardMale to Male 10 cm Wire
What this teaches
timingbutton inputstate changes
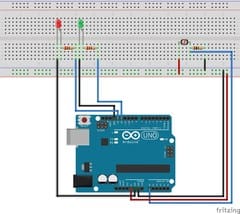
Light Meter
Read a photoresistor module and display a brightness value.
Project components
37-in-1 Arduino Sensors KitArduino Nano & Expansion BoardOLED DisplayFemale to Male 10 cm Wire
What this teaches
analog inputcalibrationthresholds
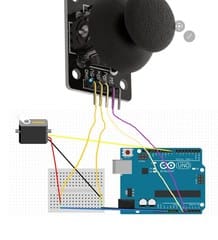
Servo Gate
Use a joystick or button to move a servo arm like a small gate or pointer.
Project components
37-in-1 Arduino Sensors KitArduino Nano & Expansion BoardMG90 Servo MotorFemale to Male 10 cm Wire
What this teaches
servo anglePWM signalmechanical load
Parking Sensor
Use distance sensing with LED or buzzer feedback as an object gets closer.
Project components
37-in-1 Arduino Sensors KitArduino Nano & Expansion BoardLED KitFemale to Male 10 cm Wire
What this teaches
distance thresholdsfeedbackdebugging one sensor at a time
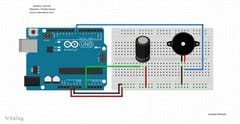
Desk Alarm
Use a tilt, vibration, touch, or knock sensor to detect movement on a desk object.
Project components
37-in-1 Arduino Sensors KitArduino Nano & Expansion BoardLED KitFemale to Male 10 cm Wire
What this teaches
switch sensorsdebouncingalarm latch
Mini Controller
Use the joystick or buttons as a small controller and show direction or values on the OLED.
Project components
37-in-1 Arduino Sensors KitArduino Nano & Expansion BoardOLED DisplayFemale to Male 10 cm Wire
What this teaches
analog X/Y inputbutton statescreen menus
Advanced ideas
Projects that may need requested components
These cards only list extra components that are present in the wider FIT guide inventory.
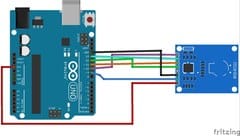
RFID Check-In Demo
Read a card or tag, then show an access message on the display.
Project components
Arduino Nano & Expansion BoardOLED DisplayFemale to Male 10 cm Wire
Requestable FIT components
RFID RC522 module
What this teaches
SPI wiringunique IDsaccess logic
NFC Object Tags
Attach tags to objects, then build a lookup or scavenger-hunt activity around them.
Project components
Arduino Nano & Expansion BoardOLED DisplayFemale to Male 10 cm Wire
Requestable FIT components
NFC sticker tagsRFID RC522 module
What this teaches
tag IDsobject metadatareader feedback
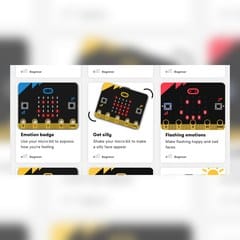
Micro:bit Remix
Use Micro:bit projects as a fast block-coding route, then compare them with Arduino builds.
Project components
LED Kitx10 Push ButtonWhite USB Type-C Cable
Requestable FIT components
Micro:bit starter kit
What this teaches
event-driven programmingbuilt-in sensorsblock-to-code learning
Large Breadboard Prototype
Move a working small circuit onto a longer breadboard when it needs clearer wiring or more space.
Project components
Arduino Nano & Expansion BoardLED Kitx10 Push ButtonMale to Male 10 cm Wire
Requestable FIT components
Breadboard longUno/Nano shield
What this teaches
layout planningpower railssignal routing
Simulators and references
Learn before wiring
Use the simulator links and source references before connecting real modules.
Keyestudio 37-in-1 sensor kit guide
Cytron Keyestudio 37-in-1 sensor kit module list
KY-numbered 37-in-1 kit: datasheets and original examples
Arduino Project Hub: weather station with OLED
Arduino Project Hub: ultrasonic sensor starter
Arduino Project Hub: photoresistor and LED
Arduino Project Hub: joystick and micro servo
Arduino Software
Wokwi Arduino simulator
Tinkercad Circuits guide
Cytron Keyestudio 37-in-1 sensor kit module list
KY-numbered 37-in-1 kit: datasheets and original examples
Arduino Project Hub: weather station with OLED
Arduino Project Hub: ultrasonic sensor starter
Arduino Project Hub: photoresistor and LED
Arduino Project Hub: joystick and micro servo
Arduino Software
Wokwi Arduino simulator
Tinkercad Circuits guide