SensorBack to 37-in-1 kit

DHT11 temperature and humidity

By Fix It Today, 07/07/2026 · 4 min read

DHT11 temperature and humidity guide for the 37-in-1 Arduino Sensors Kit.

37-in-1 kit, module 13

KY-015: DHT11 temperature and humidity

Temperature and relative humidity as whole numbers, once a second. Plug it in, upload the sketch, then change the thing it senses and watch the reading.
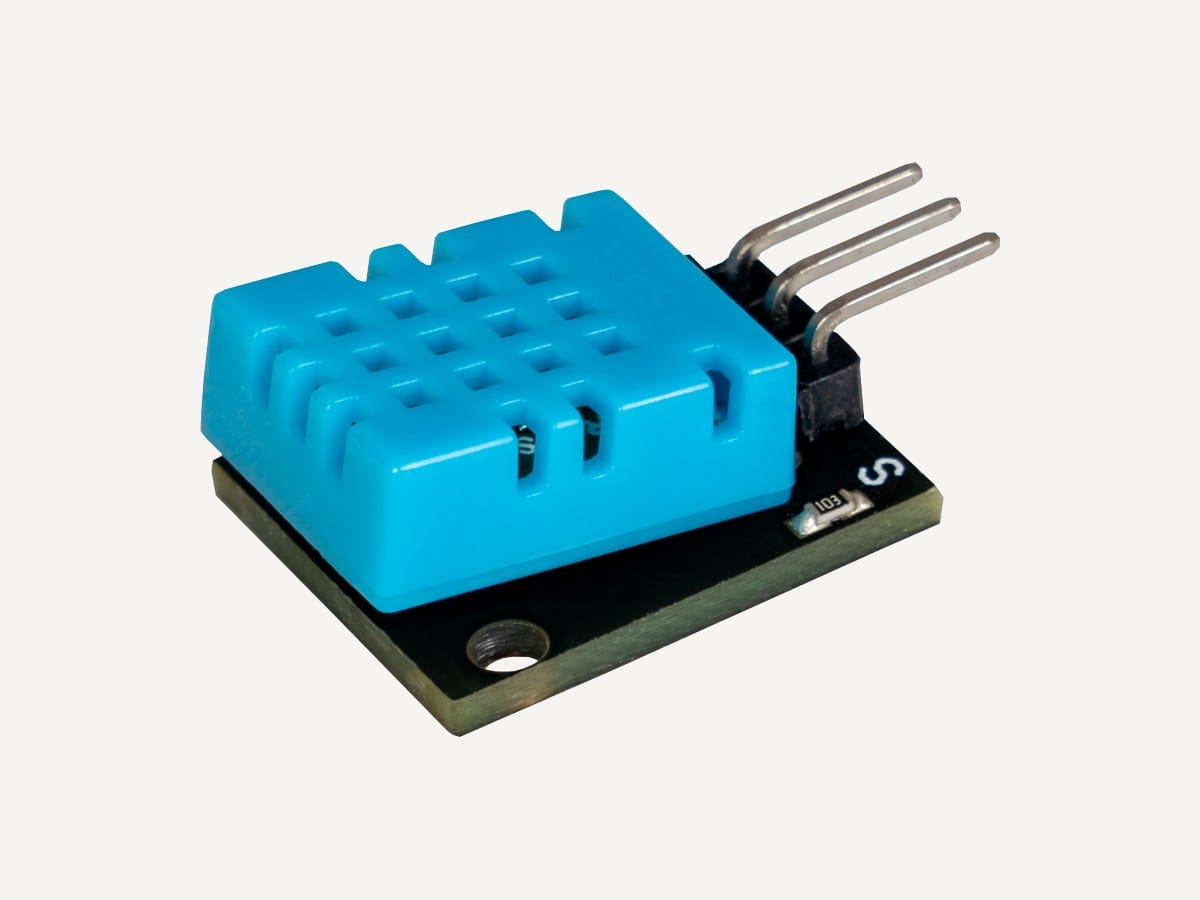
KY-015, DHT11 temperature and humidity
Module photo from the Joy-IT SensorKit documentation. The boards in the kit may not carry the Joy-IT print but are the same modules.

KY-015, DHT11 temperature and humidity

Temperature and relative humidity as whole numbers, once a second.

How it works

DHT11 temperature and humidity

What is going on

The blue block holds a humidity element, a thermistor and a tiny chip that measures both and sends them as a 40-bit message down one wire. The Nano asks, the DHT11 answers. The DHT11 library used in the workshop does the timing and hands back two integers. This is the sensor the workshop is built around; the full protocol is on the Inside the DHT11 page.

Connections

Wiring to the Arduino Nano on its expansion shield

The pins below match the sketch further down this page; change one and change the other.

Power off first

Unplug the USB cable before you plug in, move or remove any module.

A lead plugged in live can touch the wrong pin for a moment, and 5 V on a signal pin is how a module dies. Unplug, wire, check the letters, then plug the cable back in.
Module pinGoes to
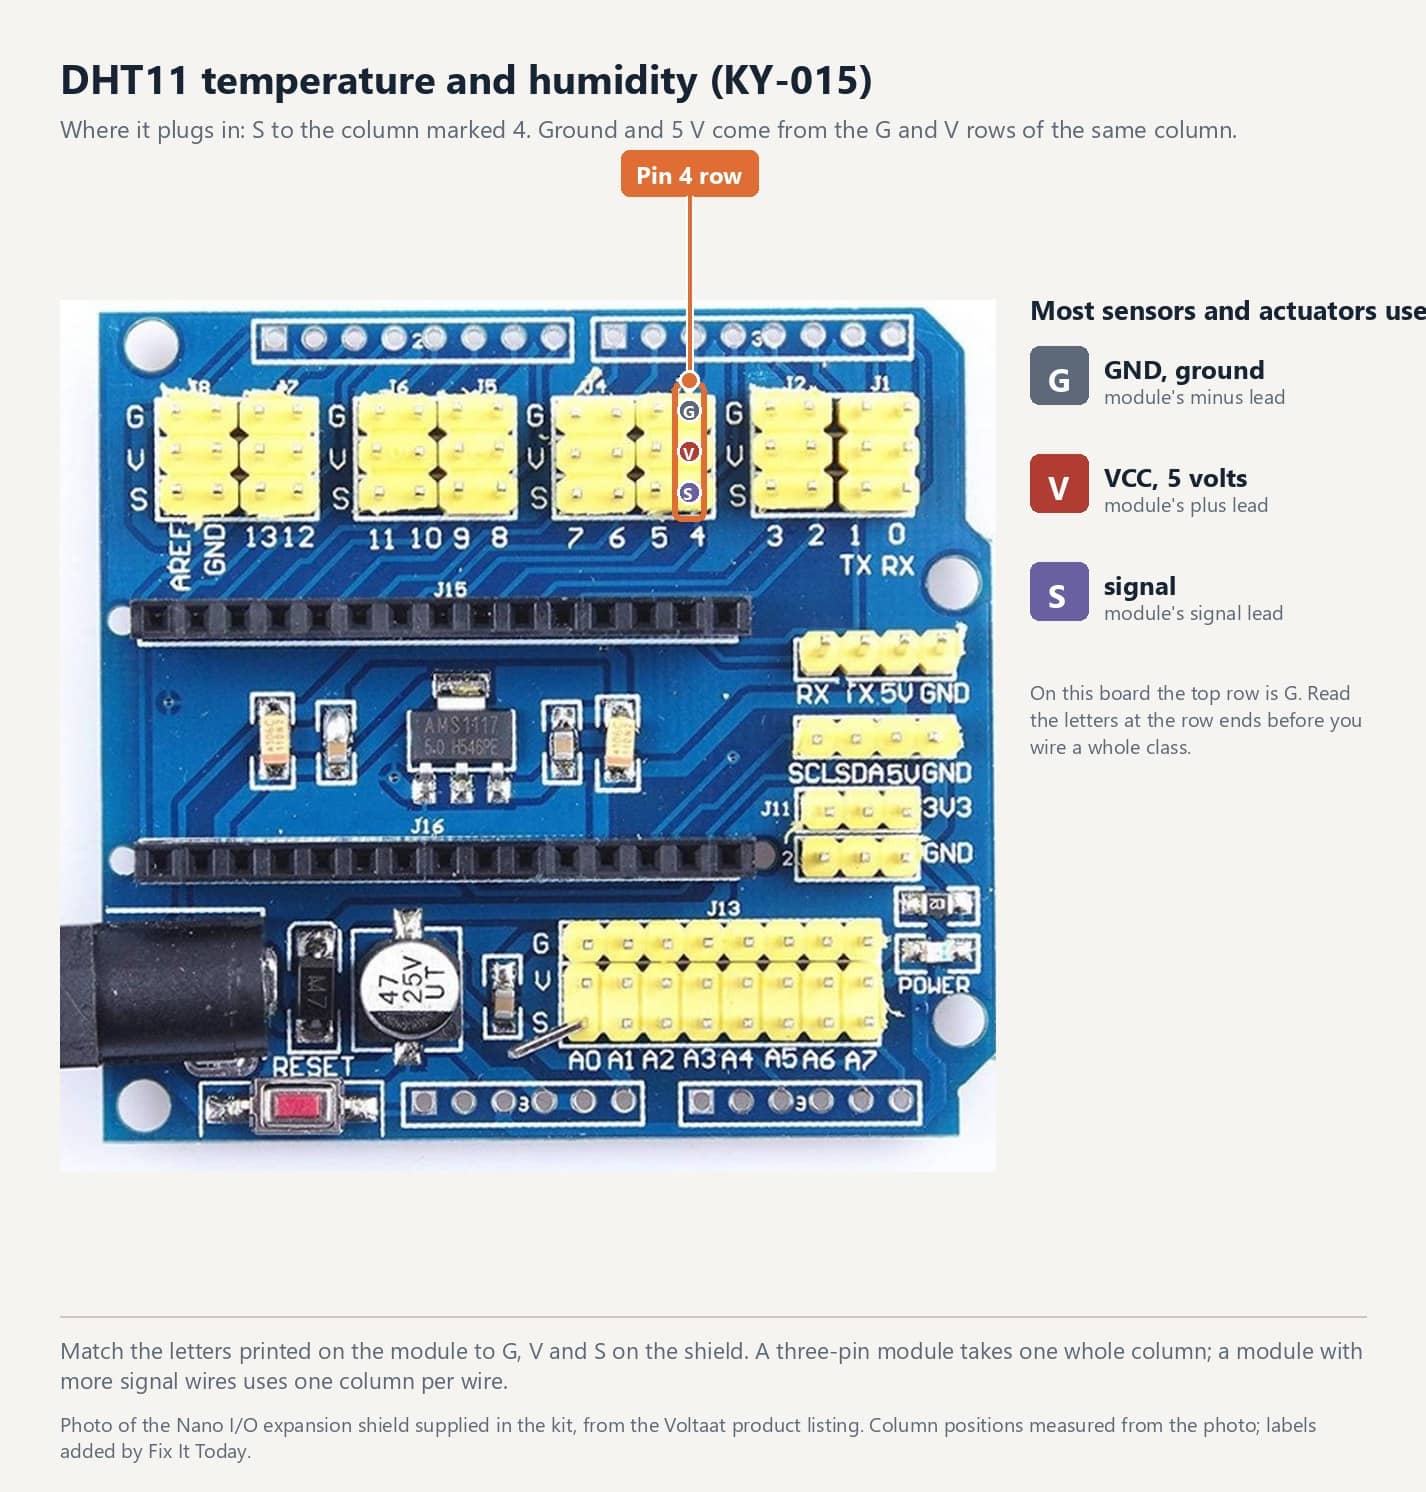
Module SS row of the column marked 4, digital bank
Module +V row, 5 V
Module -G row, ground
Where it plugs in on the shield
The Nano I/O expansion shield supplied in the kit, photographed from above for the Voltaat product listing. Column positions measured from the photo; labels added by Fix It Today.

Where it plugs in on the shield

The ringed column is the one this module uses. G on top for ground, V in the middle for 5 V, S at the bottom for the signal. A module with more than one signal wire uses one column per wire.

Read the letters on the shield

Both banks on this shield read G, V, S from the top. The letters are printed at the ends of the rows.
The module's minus or GND pin goes to G, its plus or VCC pin to V, and each signal to the S row of the numbered column.
A module in backwards puts 5 V on the signal pin. Some survive it, plenty do not.

Starter sketch

Code you can copy and upload

Every sketch on these pages is compiled for the Arduino Nano before it is published. The pin numbers at the top match the connection table above.

ky015.inoArduino C++
1#include <DHT11.h>
2
3DHT11 dht11(4); // module S -> D4
4
5void setup() {
6 Serial.begin(9600);
7 dht11.setDelay(2000); // the sensor updates about once a second
8}
9
10void loop() {
11 int temperature = 0;
12 int humidity = 0;
13 int result = dht11.readTemperatureHumidity(temperature, humidity);
14 if (result == 0) {
15 Serial.print("temperature:");
16 Serial.print(temperature);
17 Serial.print(",humidity:");
18 Serial.println(humidity);
19 } else {
20 Serial.println(DHT11::getErrorString(result));
21 }
22}

Install DHT11 by Dhruba Saha, version 2.1.0. The Adafruit library with a similar name has a different API.

Try first

Breathe on the grille from 10 cm. Humidity jumps first; temperature follows.

The quickest way to see it respond.

1

Unplug the USB cable. Plug the module into the column shown above, minus to G, plus to V, signal to S.

2

Plug the USB cable back in. Copy the sketch, upload it, and open Tools > Serial Monitor at 9600 baud.

3

Do the thing the module senses and watch the reading, the L LED, or the sound respond.

Reference

More on this module

The Joy-IT page has the datasheet figures and examples for other boards; the repository has the original vendor files.

Survey and feedback

Help improve MakerAccess

Have an idea for what MakerAccess should stock, improve, or explain next? Share it in the survey. If you bought or used a product and want to comment on the item itself, use the product feedback form.

Do the surveyProduct feedback form