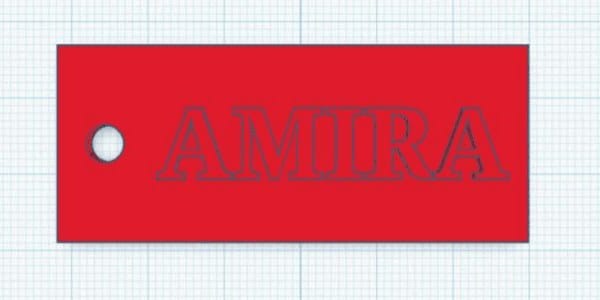
Build a name keychain in Tinkercad from a blank workplane: the plate, a ring hole, your name, and grouping it into one printable shape. Part 2 of the series.
Tinkercad
Your first model: a keychain in Tinkercad
Tinkercad is a free 3D design tool that runs inside a web browser. It needs no download and no installation, so it opens on almost any computer with an internet connection. Inside Tinkercad, you build a 3D model by dragging and combining simple shapes, like boxes and cylinders. This page builds one simple object from a blank workplane to a finished, printable design.
Once a model is finished, you can export it as an STL file, a common format that a 3D printer reads. This means the shapes you build on screen can become a real object you can hold in your hand, like a keychain with your own name on it.
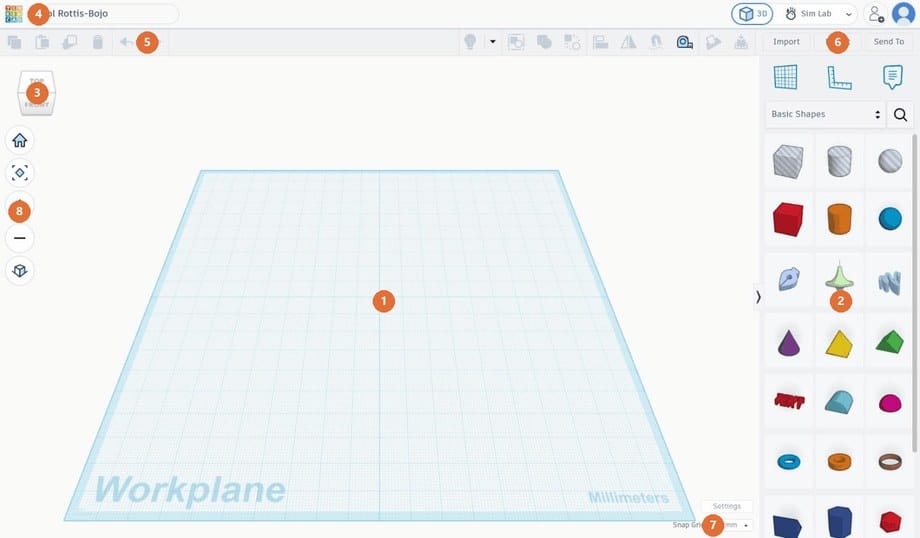
The Tinkercad screen
Eight parts worth knowing before you start
1. WorkplaneThe workplane is the blue grid where your shapes sit, and one big square on the grid equals 10mm.
2. Shape libraryThe shape library is the panel of shapes on the right, and dragging a shape from here onto the workplane adds it to your model. The dropdown above it switches between whole categories of shapes, not just Basic Shapes.
3. View cubeThe view cube lets you spin the view by dragging it, and clicking a face such as TOP or FRONT looks straight from that side.
4. Design nameThe design name sits at the top of the screen, and clicking it lets you rename your design.
5. UndoUndo is the curved arrow near the top of the screen, and pressing it (or pressing Ctrl+Z) takes back your last action.
6. Import, Export, Send ToThis group of buttons moves files in and out of Tinkercad, and you'll use Export to save your finished design as a file, such as an STL, that's ready to print.
7. Snap gridThe snap grid sets how far a shape moves in one step when it's dragged, and it's normally left at 1.0mm.
8. Home, fit and zoomThese buttons bring your view back to the start, or zoom in on whatever shape you've selected.
Building a name keychain
Six steps, start to finish
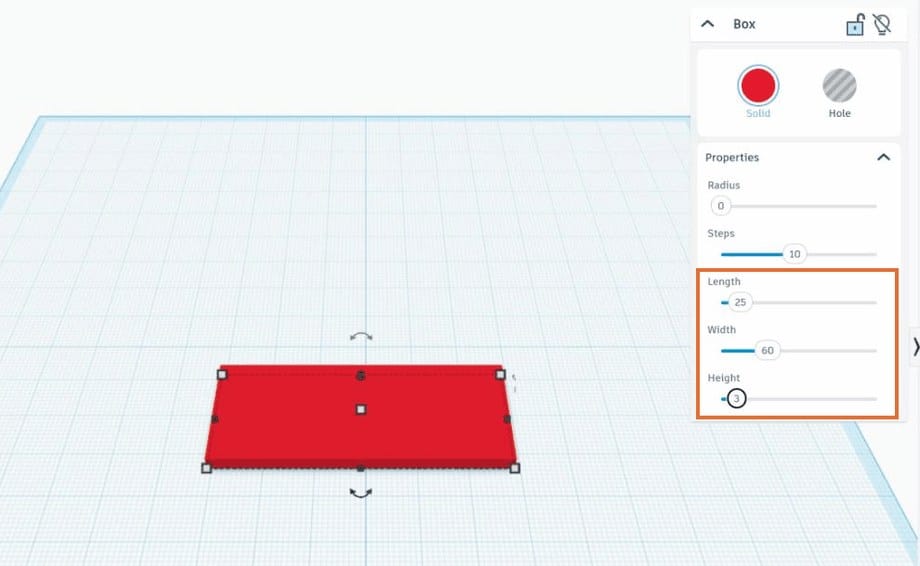
Sized in the panel: Width 60mm, Length 25mm, Height 3mm
Step 1
The plate
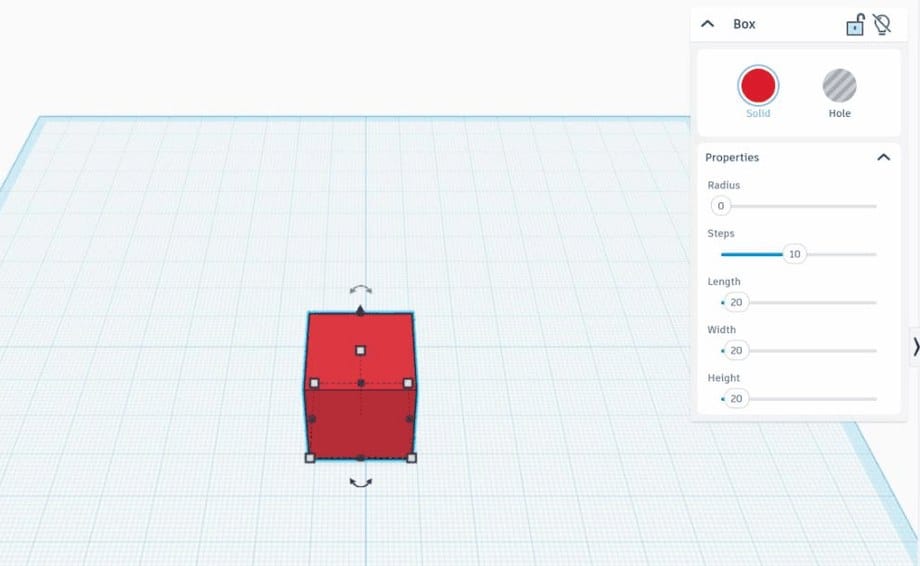
Dragging a Box onto the workplane and setting its size turns it into the flat plate that holds your keychain together.
Drag a Box from the shape library onto the workplane.
In the panel on the right, set Width to 60mm (left to right).
Set Length to 25mm (front to back).
Set Height to 3mm.
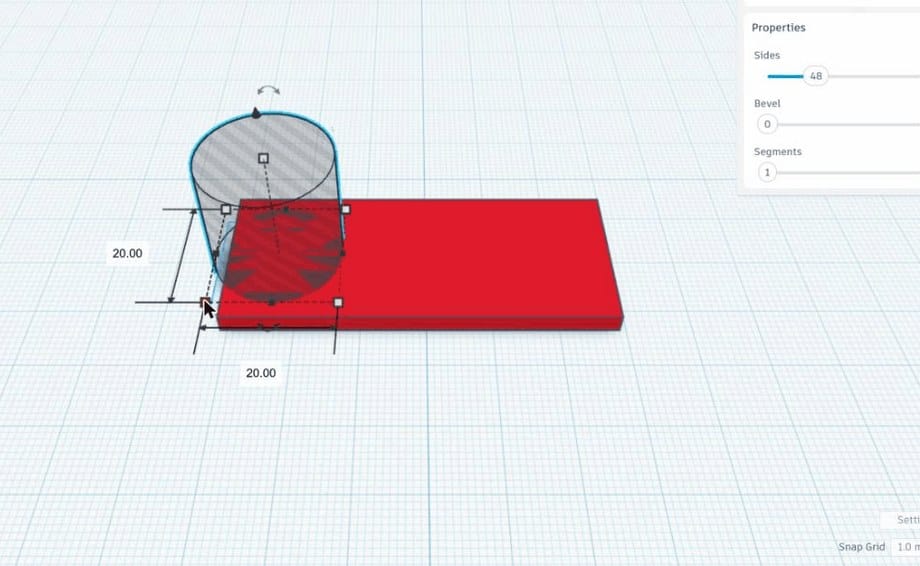
Sized with the handles: 5mm across, 6mm tall
Step 2
The ring hole
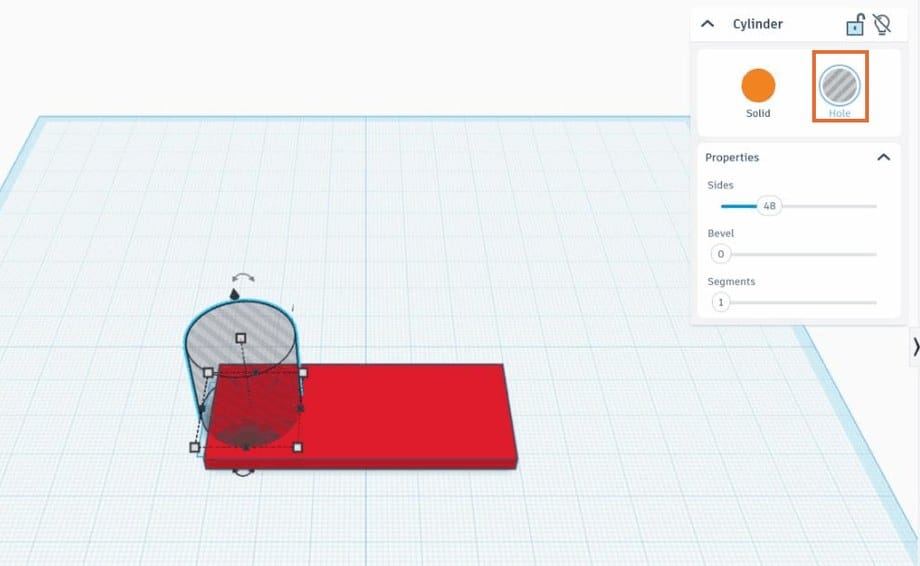
A Hole shape cuts through any solid shape it touches, which is why Tinkercad draws it in grey with stripes instead of solid blue. The Hole Cylinder marks a 5mm circle near one end of the plate, a size that fits a standard split key ring.
Drag a Hole Cylinder onto the plate, near one end.
Point at a white corner handle and type a size to make it 5mm across, so it fits a standard split key ring.
Make it 6mm tall, taller than the 3mm plate, so it cuts all the way through.
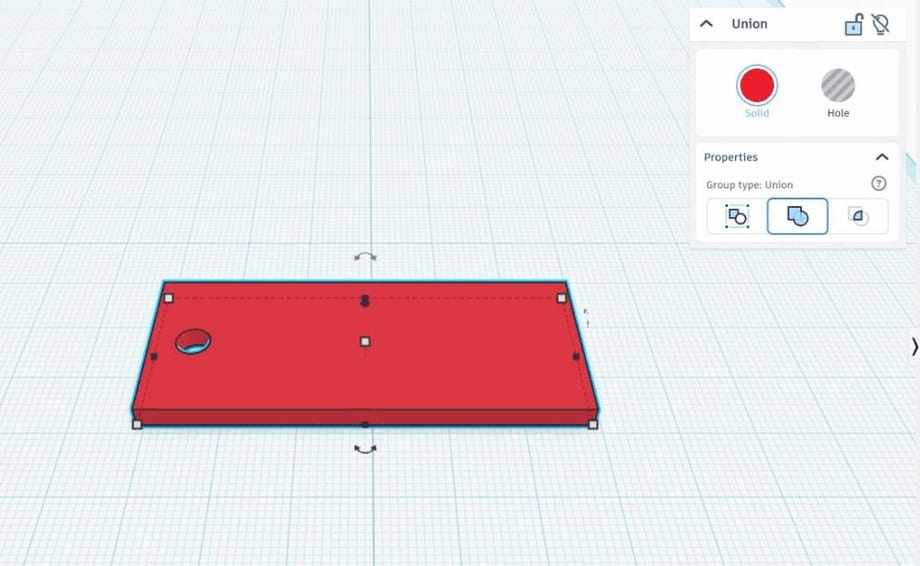
After Ctrl+G: one shape, with a hole you can see through
Step 3
Group the hole
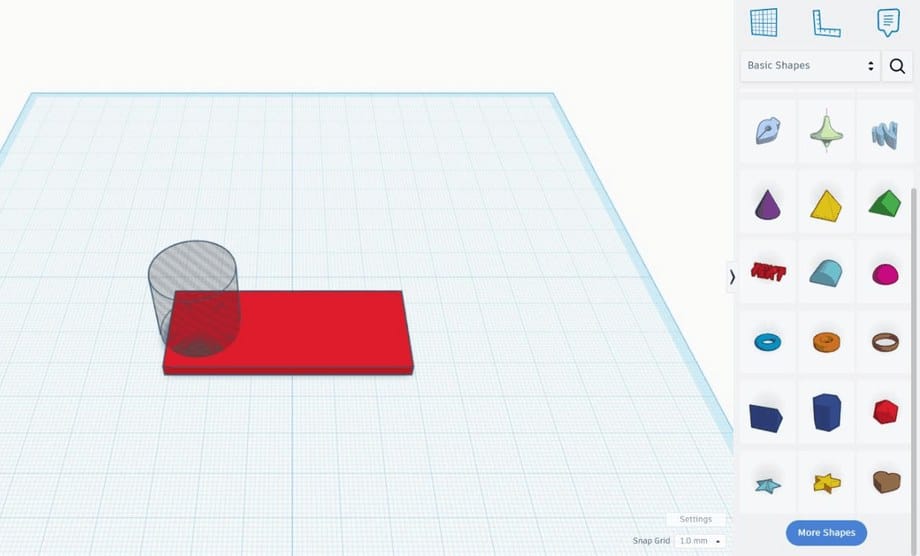
Moving the cylinder down so it pokes out on both sides of the plate makes sure the hole cuts all the way through, not partway. Selecting both shapes and pressing Ctrl+G merges them into one shape, and the striped cylinder disappears, leaving a hole you can see through.
Lower the cylinder using Ctrl and the down arrow key, or drag its black handle.
Keep lowering until it pokes out above and below the plate.
Select both the plate and the cylinder.
Press Ctrl+G to group them into one shape.
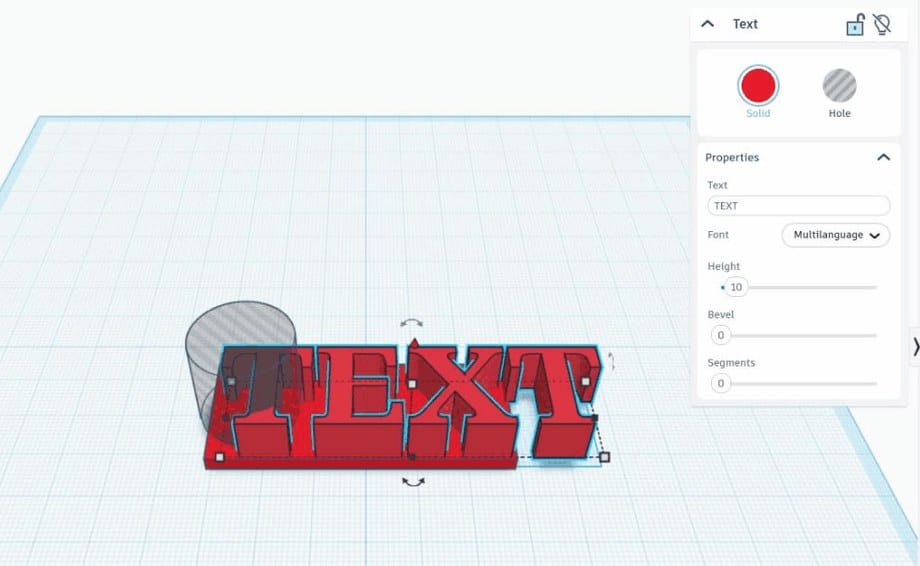
A Text shape arrives 10mm tall and too wide for the plate
Step 4
Add your name
The Text shape works like the Box and the Cylinder. It's a shape you can resize and combine with others, and typing your name into it and setting its Height to 2mm makes letters that stand up from the plate by that amount.
Drag a Text shape onto the plate.
In the panel, replace the word "Text" with your name.
Keep your name short; under 8 letters is easiest to read.
Set Height to 2mm.
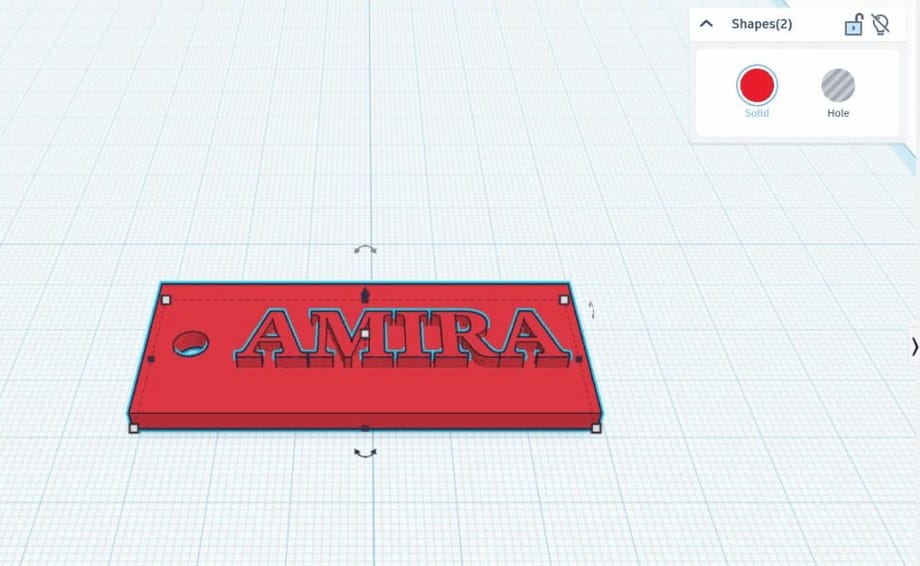
Shrunk, placed, and grouped into one shape
Step 5
Resize and group
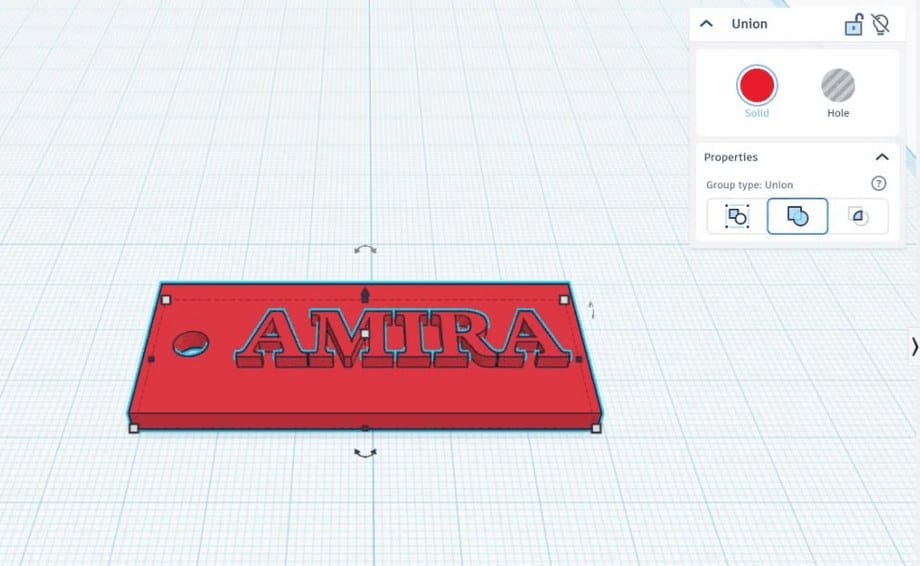
A name usually lands on the plate too large for the space next to the hole. Holding Shift while dragging a corner handle shrinks it evenly, and selecting everything with Ctrl+A before pressing Ctrl+G groups the whole keychain into one single shape.
Hold Shift and drag a corner handle inward to shrink the name.
Move the name so it fits in the space next to the hole.
Press Ctrl+A to select everything on the workplane.
Press Ctrl+G to group it all into one single shape.
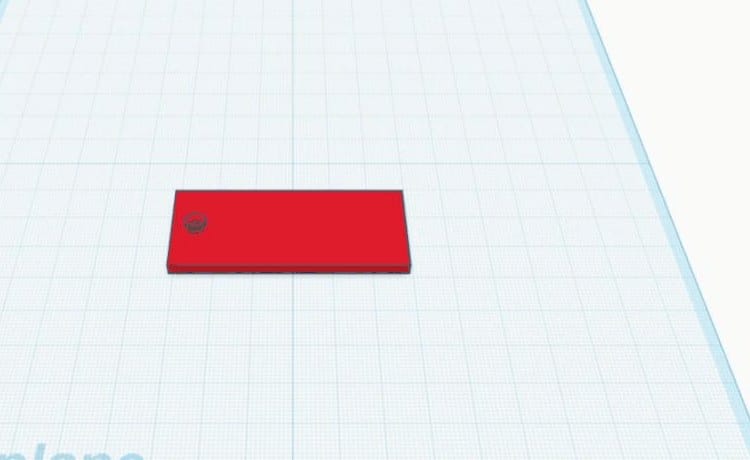
The finished keychain from the top
Step 6
Check from the front
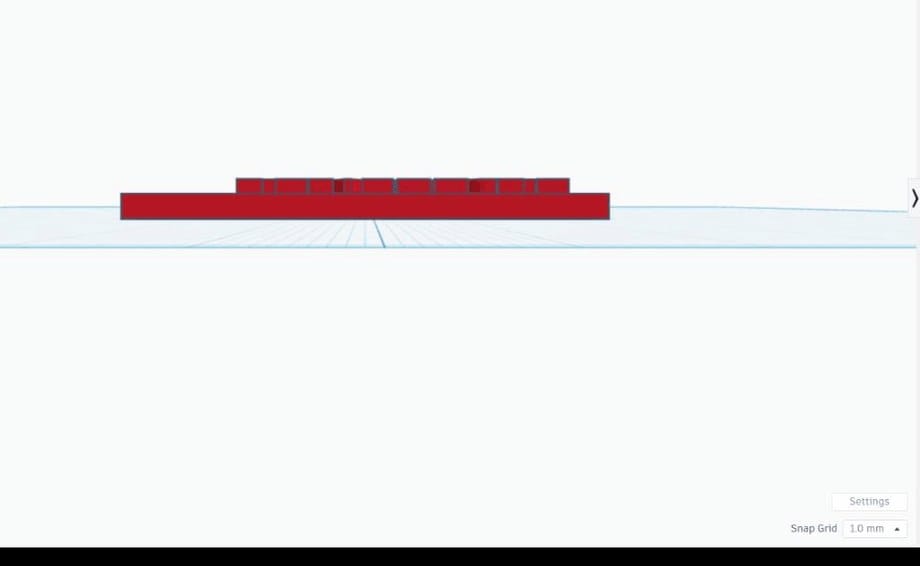
Looking at a model from the side shows problems a top-down view can hide. Clicking FRONT on the view cube shows whether the letters sit flush on the plate with no gap underneath; a gap there means the letters would print floating in the air and fail.
Click FRONT on the view cube to look at the model from the side.
Check that the letters sit flush on the plate with no gap underneath.
Check that the whole plate sits flat on the workplane.
Use Export to save your design as an STL file.
Where to go next
You know the basics
A keychain uses four tools: Box, Hole, Text and Group. Tinkercad has a lot more on offer than that. The next page goes through the rest of the toolbar and the rest of the shape library, tool by tool, so you know what each one does before you need it. After that, a second project puts several of those tools to work together on something more advanced than a keychain.