The Tinkercad Toolbox: Every Tool, What It Does
By Admin, 16/09/2026 · 7 min read

Tinkercad
The Tinkercad toolbox: every tool, what it does
The keychain on the last page used four tools: Box, Hole, Text and Group. Tinkercad has a much bigger shape library and a full toolbar of ways to move, measure, combine and colour shapes. This page goes through what's actually available, tool by tool, so the next project can use more of it.
The shape library
More than Basic Shapes
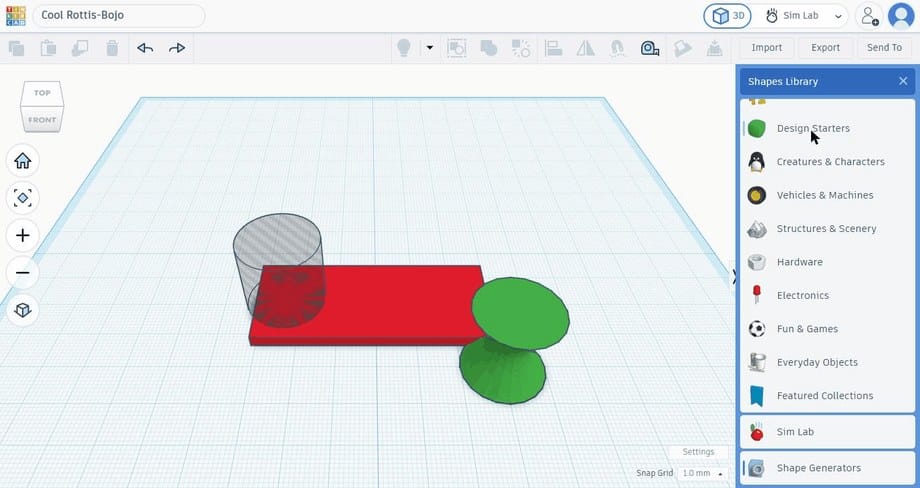
- Basic Shapes: the boxes, cylinders, spheres and cones the keychain page used.
- Letters & Numbers: every letter and digit as its own ready-made 3D tile.
- Shape Generators: parametric shapes, made by other Tinkercad users, with their own sliders.
- Design Starters, Creatures & Characters, Vehicles & Machines, Structures & Scenery: large pre-built shapes to remix rather than build from scratch.
- Hardware and Electronics: nuts, bolts, breadboards and other technical parts, sized to real components.
- Fun & Games and Everyday Objects: household items and playful shapes for quick projects.
- Featured Collections: shape sets Tinkercad highlights from its community.
- Sim Lab: shapes built for Tinkercad's physics and circuit simulations rather than for printing.
Letters & Numbers
A whole category of ready-made text
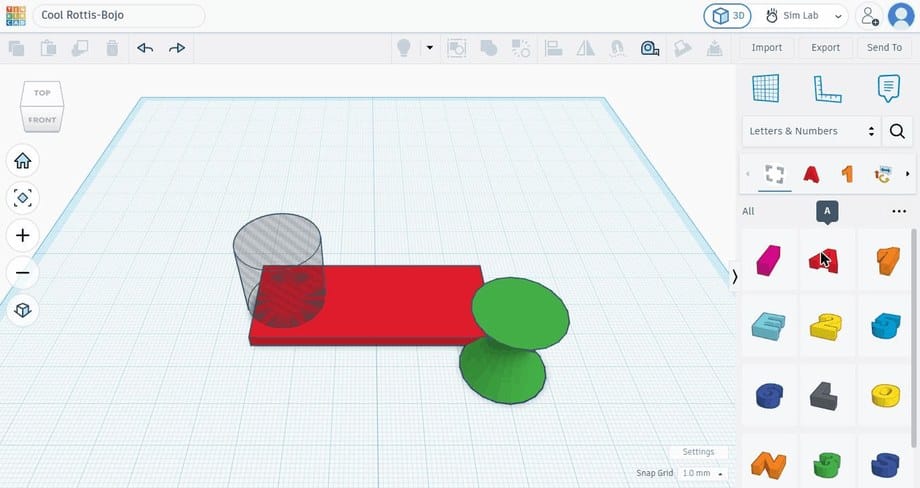
The keychain page used the Text tool to type a whole word at once. This category is different: it holds individual letters and numbers as their own shapes, which is useful when a design needs one big number, or letters that each need a different size, colour or position rather than one word moving together.
Shape Generators
Parametric shapes with sliders
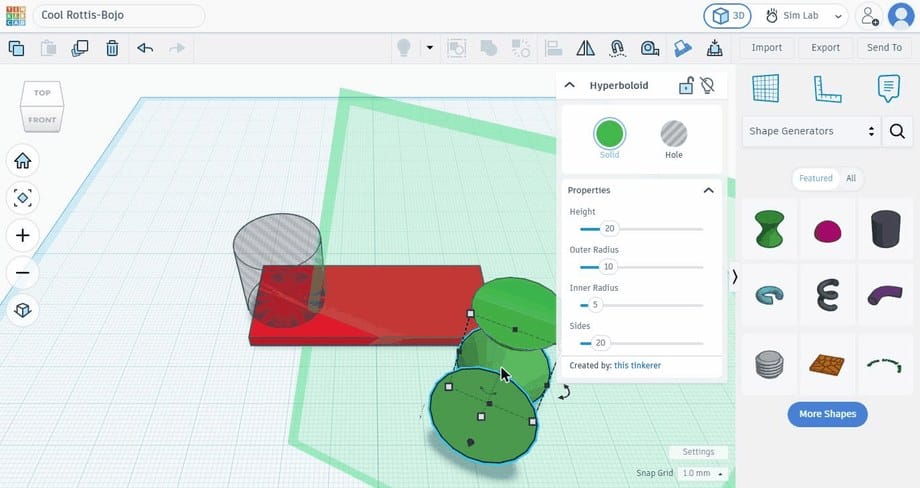
A Shape Generator is a shape built by another Tinkercad user out of simple maths and code, then shared for anyone to drop onto their own workplane. Unlike a Box or Cylinder, a generator often comes with its own set of numeric properties, similar to Length or Height, that reshape it in more complex ways than a basic shape can.
The toolbar
Tool by tool
Every tool below sits along the top of the Tinkercad editor. Most only do something once two or more shapes, or two points, are selected first.
Align
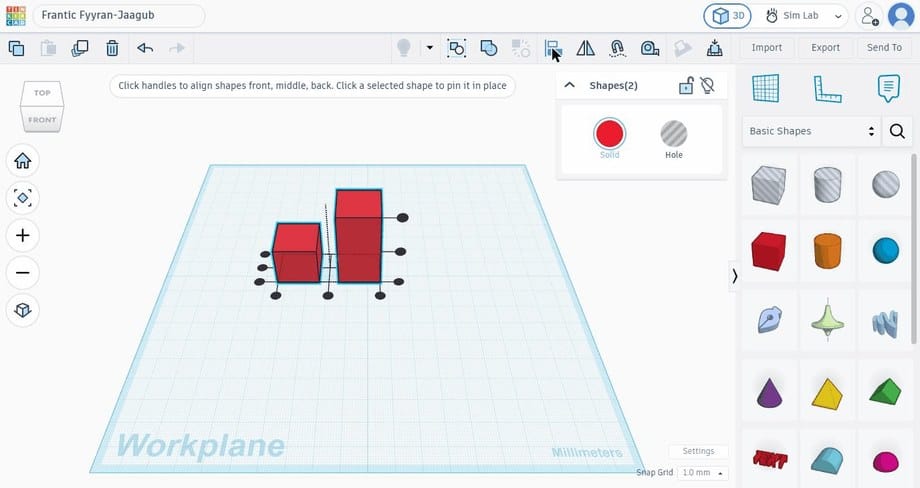
Align lines up two or more selected shapes without needing to drag them by eye. Clicking a dot moves the other shapes to match one edge or the centre line of the shape you click. This is the tool to reach for whenever a design needs several boxes centred on each other, or lined up flush along one edge.
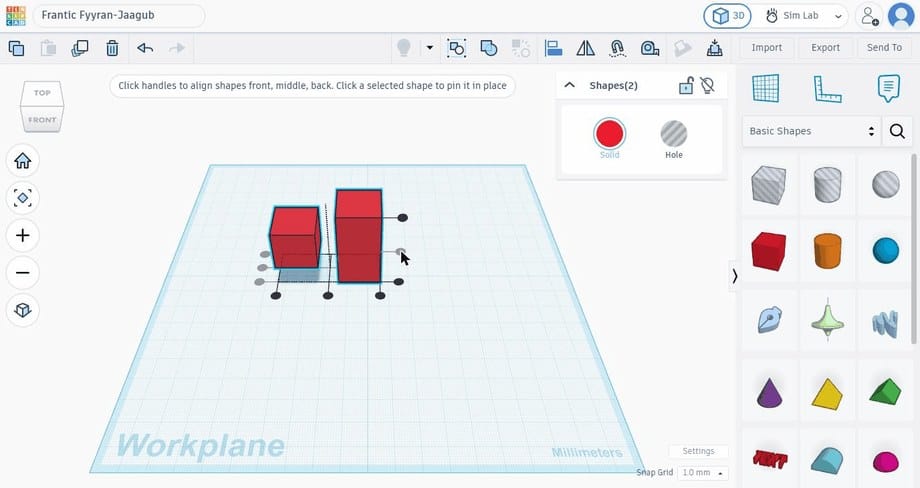
Mirror
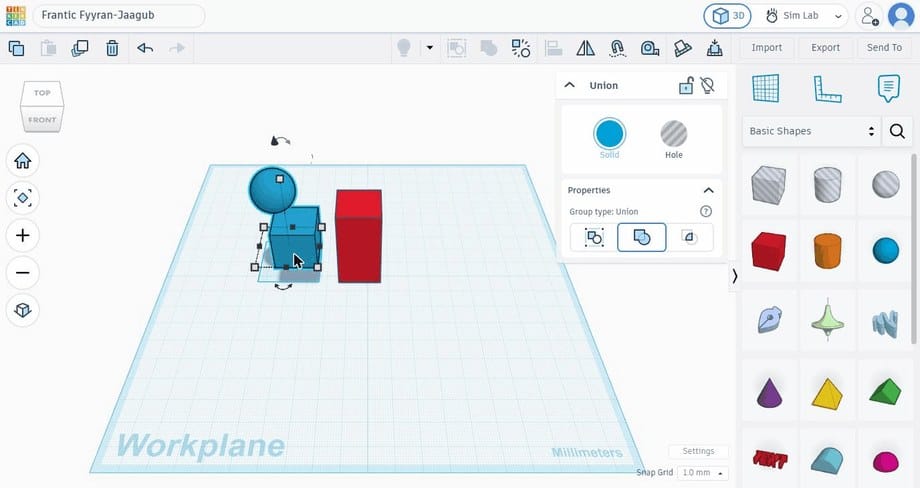
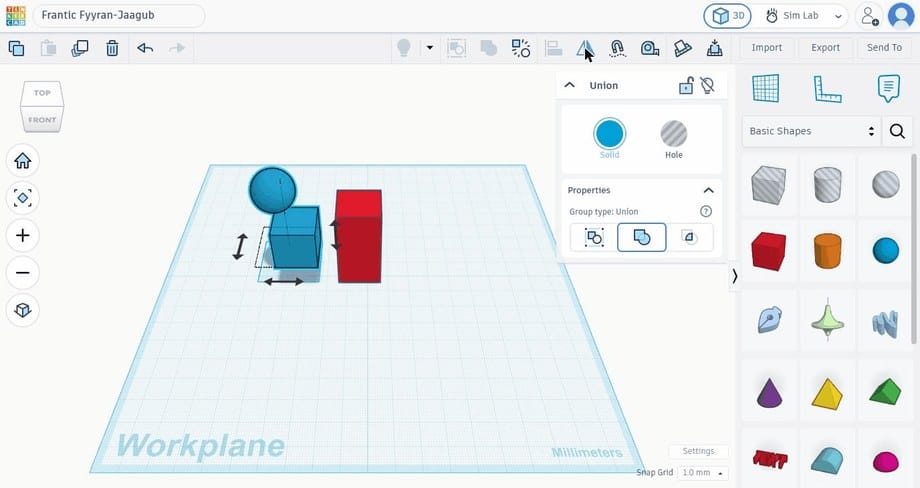
Mirror flips the selected shape or shapes, like a reflection. It's the fastest way to build something symmetrical: model one half, select it, click Mirror, then group the two halves together.
Ruler
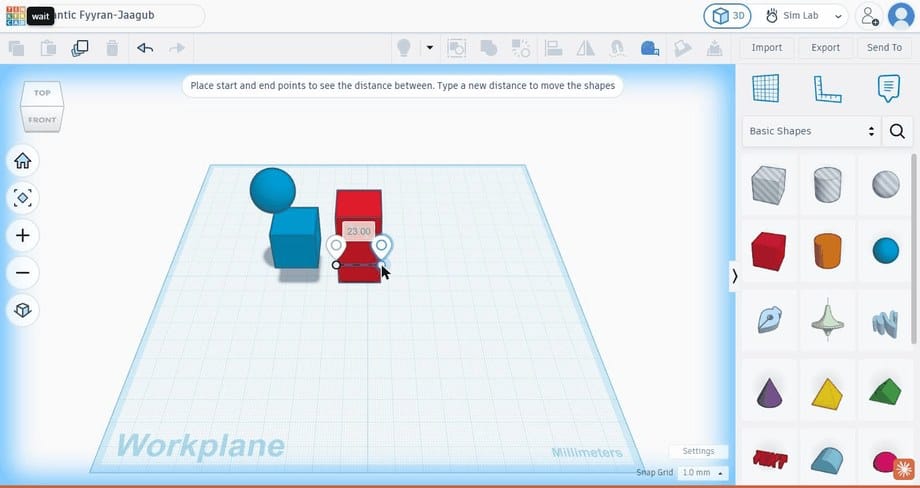
The Ruler measures the distance between two points and shows the number on screen as you place them. Typing a new number into that reading moves the second point to match, which makes it a quick way to space shapes apart by an exact amount.
Group and Ungroup
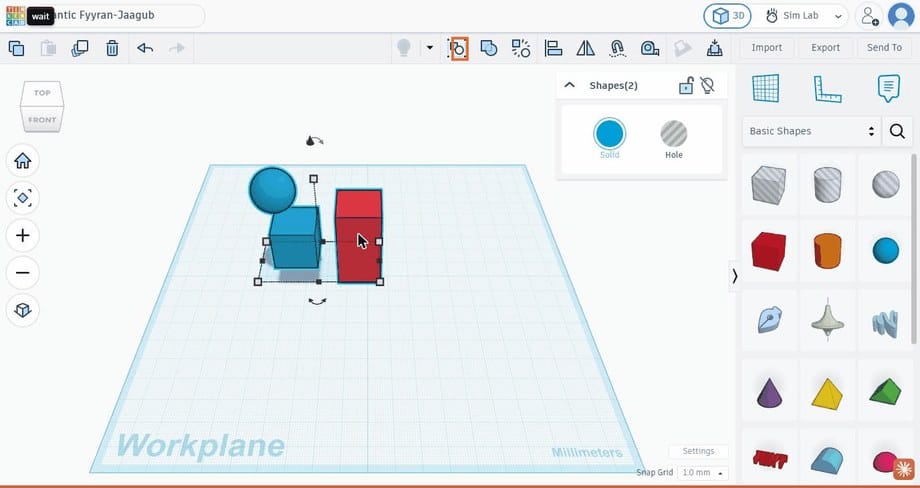
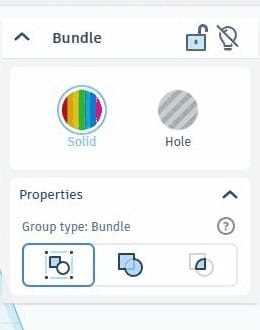
Group, or Ctrl+G, combines every selected shape into one. The keychain page already used this to cut a hole and to attach a name. Once shapes are grouped, the panel lets you choose the group type. Bundle keeps every shape's own colour and treats them as one unit for moving and resizing. Union merges them into a single solid with one colour, which is usually what you want on a design you're about to export and print. Ungroup, the icon next to Group, splits a grouped shape back into its separate parts.
Workplane
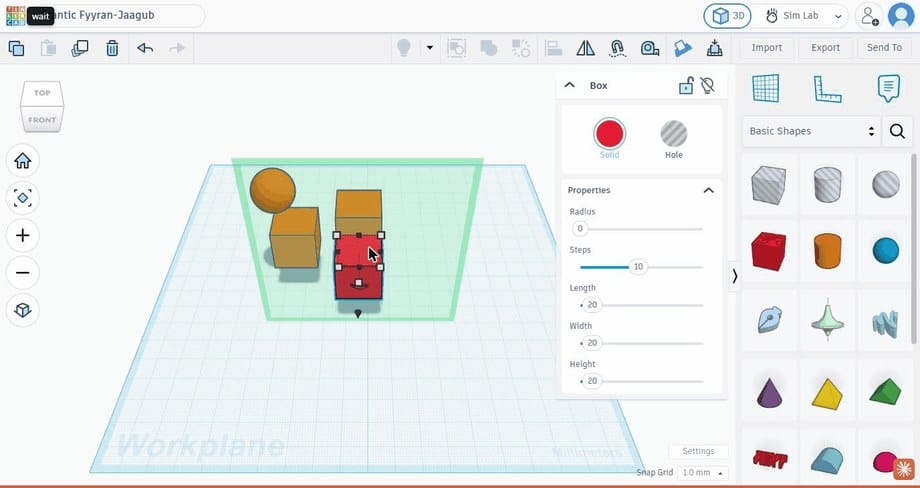
New shapes usually drop flat onto the grey base plate. The workplane tool changes that: clicking any flat face on any shape moves the workplane onto that face instead, shown in green. Any shape dropped after that lands flush against the new face rather than the base plate, which is the easiest way to add a detail onto the side or front of a taller model instead of only its top.
Colour
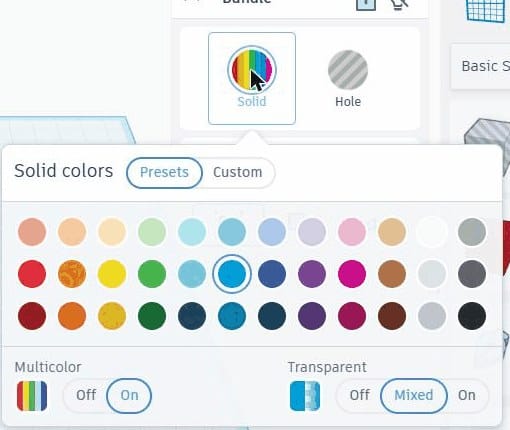
Clicking the coloured circle on a selected shape opens its colour options: a row of presets, a Custom tab for picking any colour, a Multicolor toggle for grouped shapes that should keep several colours, and a Transparent toggle for a see-through preview. Colour in Tinkercad is only a preview. What actually prints depends on which filament colour is loaded in the printer.
Snap Grid
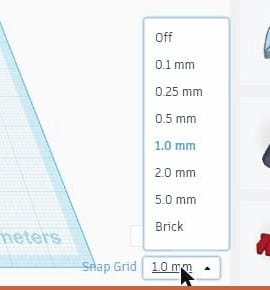
Snap Grid sets the smallest step a shape moves when it's dragged or nudged with the arrow keys. A larger step, such as 5.0mm, makes it easy to line shapes up roughly by eye. A smaller step, such as 0.1mm, gives finer control once a shape is nearly in the right place. Turning it Off allows completely free movement.
Notes
Pressing N turns on the Notes tool, which drops a sticky-note style comment onto the workplane instead of a shape. It doesn't affect the model at all, so it's useful for leaving a reminder on a shared design, such as which part still needs resizing.
Getting work in and out
Import and Export
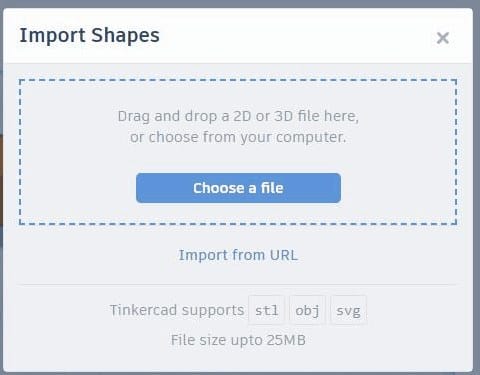
Import brings an existing file onto the workplane as a new shape, which you can then combine with other shapes the normal way. This is how a shape modelled somewhere else, or downloaded from Tinkercad's own community gallery, joins a design.
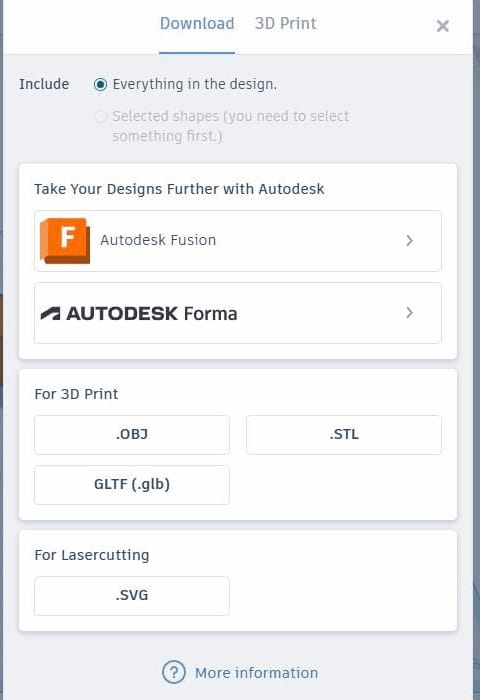
Export turns the finished design into a file another program can open. STL and OBJ are the formats a slicer such as Bambu Studio reads for 3D printing. SVG is a flat, 2D format for a laser cutter instead of a 3D printer. Export can also send a design straight into Autodesk Fusion, for anyone who outgrows what Tinkercad alone can do.
Where to go next
Put it all together
Knowing what each tool does is one thing. The next page uses several of them together, Align, a hole cut through an upright wall, and choosing Union deliberately, to build something a bit more advanced than a keychain.
Related articles

Building More With Tinkercad: A Phone and Cable Stand
A more advanced Tinkercad project than a keychain: a phone and cable stand built with Align, a hole cut through an upright wall, and a Union group. Part 4 of the series.

Your First Model: A Keychain in Tinkercad
Build a name keychain in Tinkercad from a blank workplane: the plate, a ring hole, your name, and grouping it into one printable shape. Part 2 of the series.

Introduction to 3D Printing and Modelling
How an FDM 3D printer builds an object layer by layer, from a design file to a finished print. Part 1 of a four-part series on 3D printing and Tinkercad.