Introduction to 3D Printing and Modelling
By Admin, 15/09/2026 · 6 min read

3D printing
How does a 3D printer actually work?
A 3D printer builds a solid object by adding material one thin layer at a time, under the control of a computer. This way of building is called additive manufacturing, because the printer adds material instead of cutting it away.
Fix It Today's printers, the Bambu Lab X1 Carbon and the H2D, both build objects using a method called FDM. FDM is short for Fused Deposition Modelling. An FDM printer builds objects out of melted plastic, one layer at a time.
From a file to a finished object
Design, slice, print
Four steps turn a shape on a screen into an object you can hold.
Every 3D print starts as a 3D model. A 3D model is a file that records the exact shape of an object in three dimensions. Someone designs this file on a computer, using software made for 3D modelling. You'll usually see this kind of file end in .stl or .3mf.
A program called a slicer reads the 3D model next. The slicer cuts the shape into many thin, flat layers, a bit like slicing a loaf of bread. Each layer is one horizontal slice of the finished object.
The slicer writes exact instructions for every layer. These instructions tell the printer how far to move and how much melted plastic to push out at each point. The slicer saves everything in a file called G-code, a long list of precise moves for the printer to follow.
The printer reads the G-code file from the first line to the last. It prints one full layer. Then it moves up a tiny amount and prints the next layer directly on top. It repeats this many times until the object is finished.
The parts of an FDM printer
What each part does
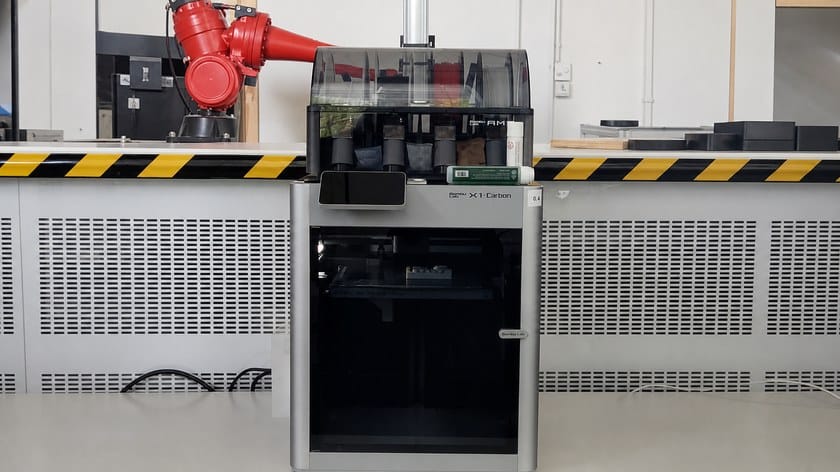
A real Bambu Lab X1 Carbon, with its AMS filament unit on top.
How the layers build up
Melted plastic, one layer at a time
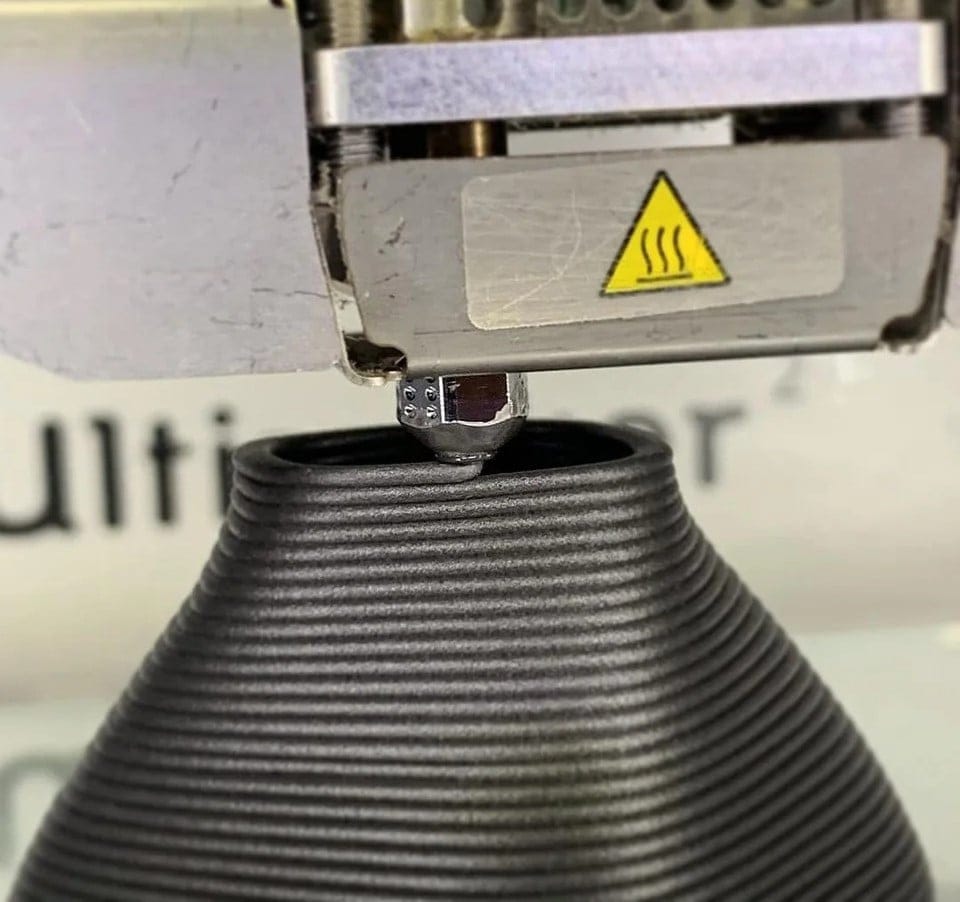
Melted plastic leaves the nozzle as a thin string. It cools and hardens quickly once it's out in the air. This fast cooling is what lets the printer place one layer directly on top of the last one.
Each new layer has to bond to the layer underneath it. If a layer doesn't stick properly, the object can crack or come apart later, sometimes even while it's still printing.
A shape with nothing underneath it is hard for a printer to build. This kind of shape is often called an overhang. Melted plastic has nowhere to land if it's pushed out into empty air, so it sags or drips instead of forming a clean layer. Printers often get around this by adding thin support structures underneath the overhang, which get removed once the print is done.
What the object is made of
Filament and PLA
Filament comes in several types of plastic, and each type behaves a little differently when it's heated. PLA is a type of plastic filament used by many school 3D printers, because it melts at a temperature these printers can reach easily and doesn't warp much as it cools. It's made partly from plant starch, such as corn, while many other printing plastics come from crude oil.
Ask an adult first
Watch it happen
A short video
Where to go next
This is a series
This page covers what a 3D printer is actually doing. The rest of the series is where the hands-on work happens: designing a first model in Tinkercad, a full tour of every Tinkercad tool, and a second, more advanced project that puts the whole toolbox to work. Each page links to the next one further down.
Once a design is exported from Tinkercad, a program called a slicer turns it into instructions a printer can follow. Bambu Studio is the slicer used with Fix It Today printers, and it has its own full guide.
Related articles

Building More With Tinkercad: A Phone and Cable Stand
A more advanced Tinkercad project than a keychain: a phone and cable stand built with Align, a hole cut through an upright wall, and a Union group. Part 4 of the series.

The Tinkercad Toolbox: Every Tool, What It Does
Every Tinkercad tool explained: the full shape library, Align, Mirror, Group and Ungroup, the Workplane tool, Colour, Snap Grid, and Import and Export. Part 3 of the series.

Your First Model: A Keychain in Tinkercad
Build a name keychain in Tinkercad from a blank workplane: the plate, a ring hole, your name, and grouping it into one printable shape. Part 2 of the series.