Bambu Studio
From a model to a checked print job
Browse a model, prepare it for the X1 Carbon, match the installed filament, inspect the sliced result and send the correct plate to the printer.
Step 1Prepare the model
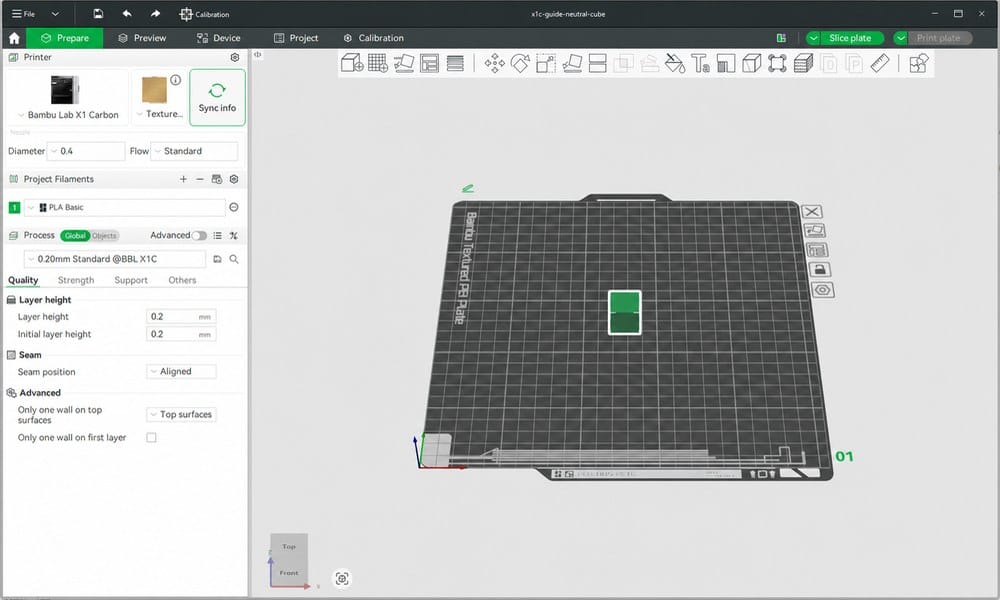
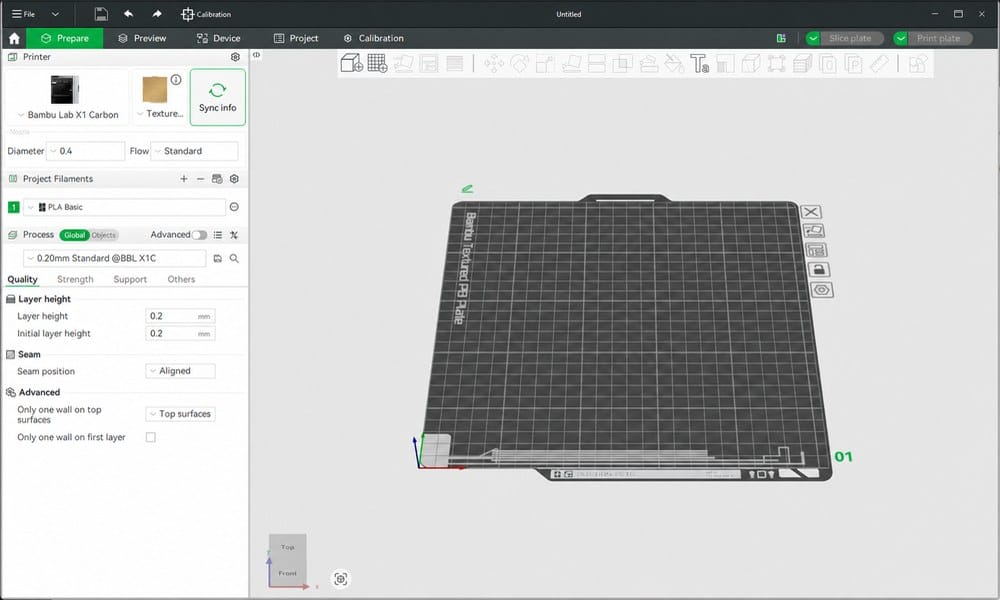
Open a downloaded 3MF, STL or STEP file, then select the X1 Carbon, nozzle size and plate that match the machine.
- Use Online Models from the Home screen to browse MakerWorld, or open a model file already saved on the computer.
- For a MakerWorld model, read the model profile and choose a print profile for the correct printer and nozzle. Open it in Bambu Studio and review every setting instead of treating the profile as universal.
- For a local file, use Open Project for 3MF projects or import the mesh into a new project.
Step 2Place the model on the plate
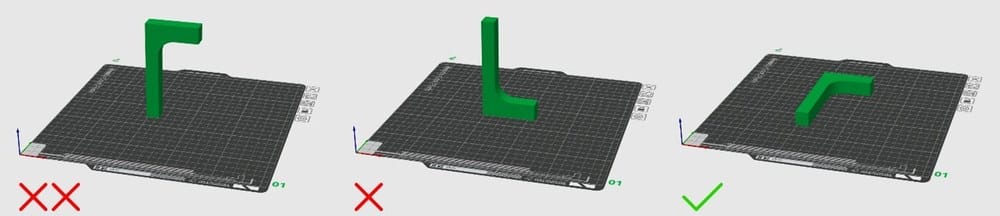
Rotate the part onto a stable face. A larger contact area usually gives a more reliable first layer and may reduce support material.
- Use Lay on Face for a flat, stable orientation; keep tall narrow parts away from orientations that can wobble.
- Check that no part extends beyond the printable plate boundary.
- Add supports only where overhangs need them, then inspect the supported surfaces in Preview.
Step 3Match the filament
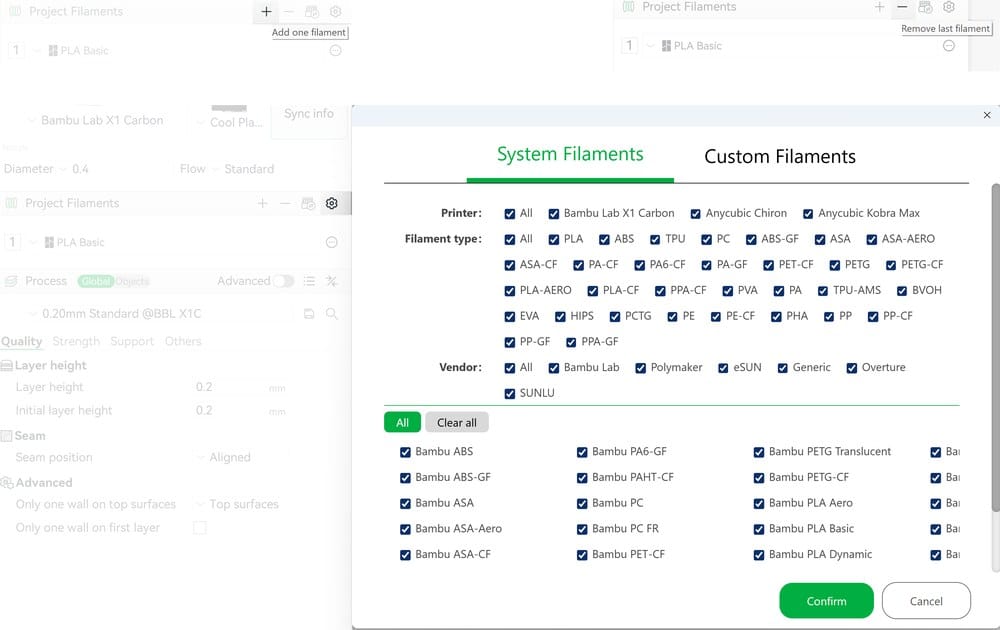
Set the project filament to the material that is physically loaded. The material choice controls temperatures, cooling and flow behaviour.
- Choose the actual material family, such as PLA, PETG or ABS, before slicing.
- If an AMS is connected, use Sync or Resync to read the installed slots, then map each project colour to the intended slot.
- Do not map a PLA profile to PETG or ABS merely because the colour matches; temperature and cooling requirements differ.
Step 4Slice and inspect the preview
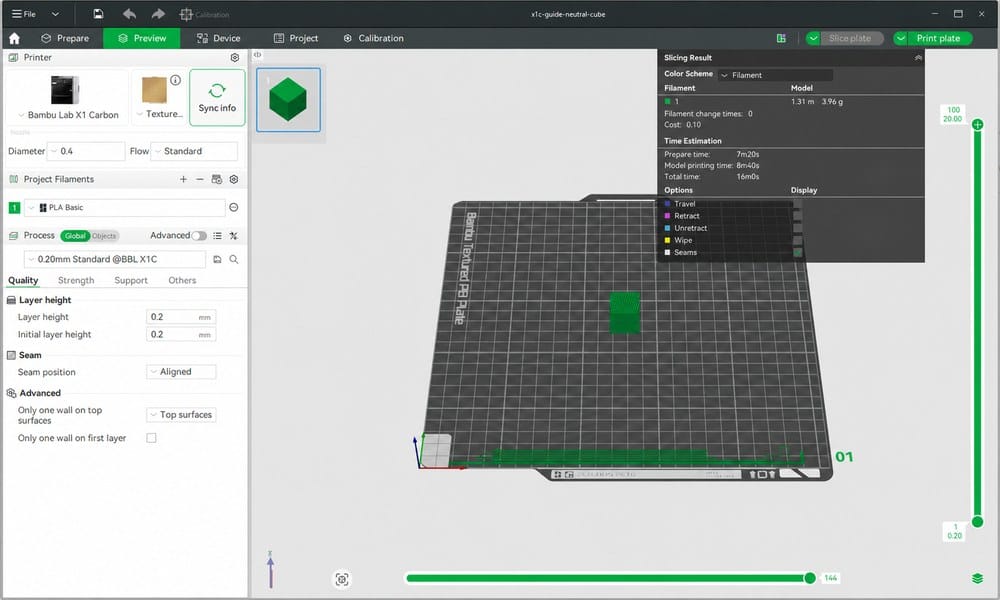
Slicing converts the model into printer movements, extrusion and temperature instructions. Inspect the first layer, supports, travel and estimated material before printing.
- Check the bottom layer for continuous lines and enough contact with the plate.
- Move the layer slider through the model to find unsupported islands, excessive support or unexpected gaps.
- Review print time and filament use. Change layer height, wall count or infill only when the part needs a different balance of finish, strength and speed.
Step 5Send the prepared plate
Confirm the printer, plate and AMS slot mapping in the print dialog before starting the job.
- Select the correct X1 Carbon and verify the plate type shown in the dialog matches the plate installed in the printer.
- Check each colour-to-AMS mapping, especially after changing a spool.
- Keep bed levelling enabled for routine prints. Watch the first layer and stop the print if lines drag, curl or fail to stick.
Sources
References
Software controls may move between releases. These links provide the current Bambu Studio and MakerWorld references.