Install Arduino IDE on Windows or Mac
By Admin, 15/07/2026 · 2 min read
Software setup
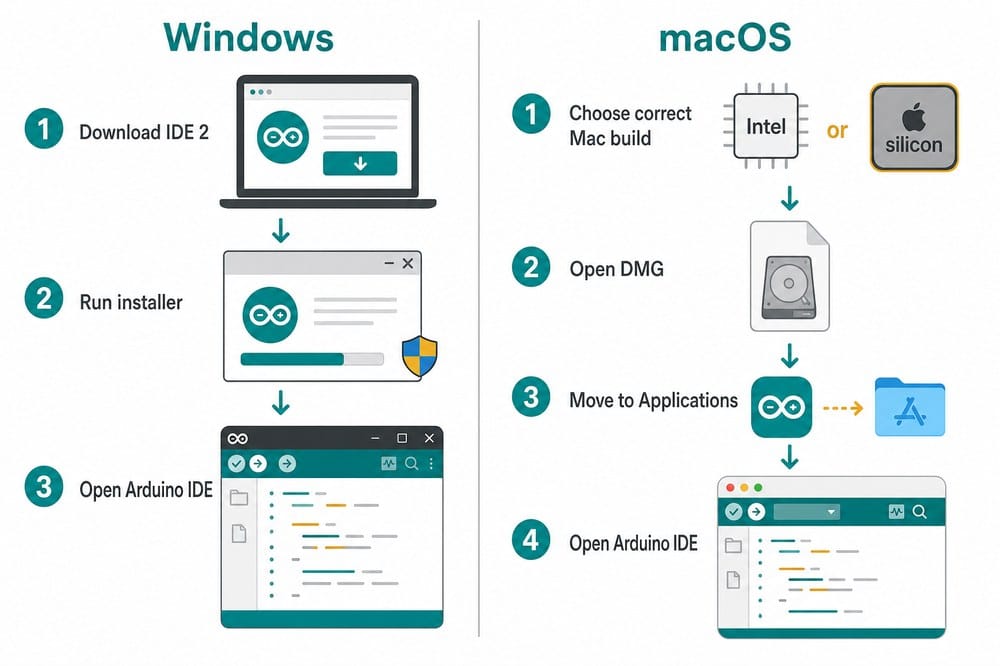
Install Arduino IDE on Windows or Mac
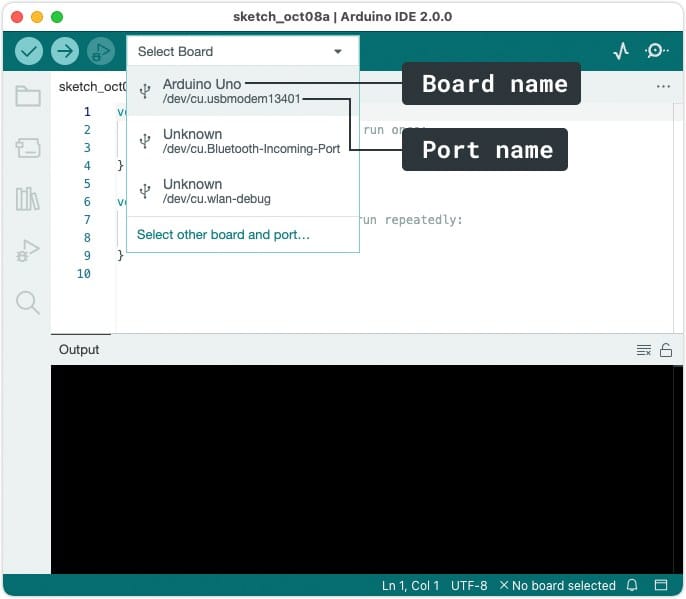
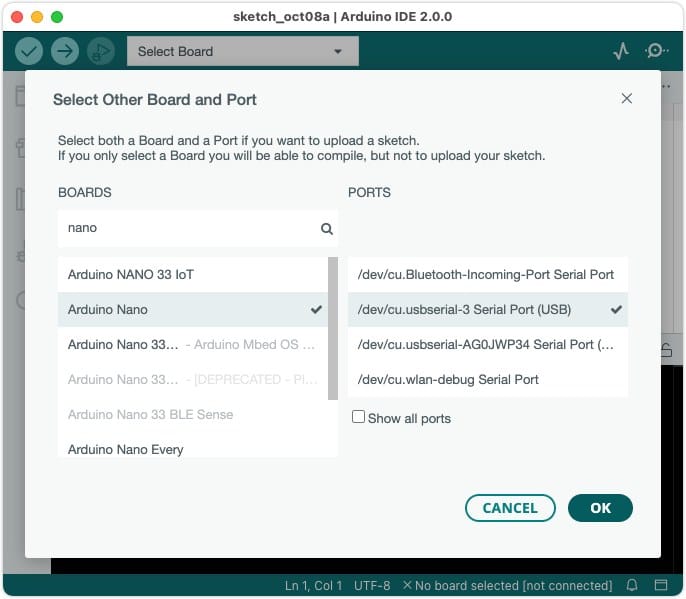
Install the current Arduino IDE 2 release on Windows or macOS and confirm that a board and serial port can be selected.
Things to check
Sources
Official downloads and instructions
Download pages and eligibility rules can change. Use these official links for the current package and requirements.
Related articles

3D Printing Theory and Material Properties
Understand layers, stiffness, strength, toughness, heat resistance and slicer settings before building your next prototype.

Common 3D Printer Problems
A menu of common 3D printer problems, from power and extruder faults to filament, bed, temperature, motion, software and print-quality issues.

3D Printing on the Bambu Lab X1E
Use the X1E by matching the X1-series profile, secure network option, active chamber and filament before sending the job.